
|
T u t o r i a l - Bones - Muscles (Using Expressions) |
|---|
Skill Level: Intermediate
Disclaimer:
Since Muscles are an advanced form of bones, I'm going to
assume that you are already familiar with creating a skeletal
setup. I'm also going to assume that you have played with
messiah for a while and are familiar with the basics.
Call me crazy, but that's what I'm going to do.
Description:
Take an arm, add bones, add muscle (using expressions), play.
Note:
For this tutorial, when moving the items around in Setup
mode, make sure Transform Keys is on: On the Rest block
in Setup, set XForm to All Keys.
(Transform = XForm)
Here we
go:
1) On the New Item block in Setup (Items
sub-tab), create a null, then add the Bone_Deform effect on
the Effects sub-tab.

2) Now press Add Child Bone twice to add two bones, and rename them as Upper_Arm and Lower_Arm by double-clicking on them in the Item List (the list on the left).

3) Select Upper_Arm and add a child, then name it Bicep.
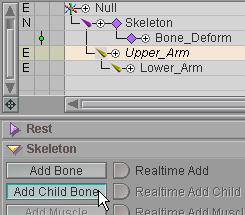

4) With Bicep still selected, turn off Align Z to Parent Length on the Bone block and position the Bicep over the Upper_Arm, slightly forward.

5) Rotate the Bicep in P (pitch) so that it's tip touches the middle line of the Lower_Arm.
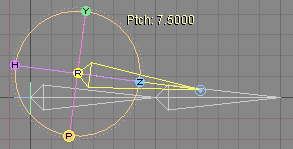
6) Add a null named Bicep_Connector, and parent it to the Lower_Armand position it so it is at the same point that the Bicep touches the Lower_Arm.

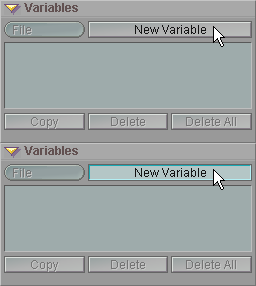
7) On the Command tab, create a New Variable (Variables block) and select Muscle from the functions pulldown list on the Expressions block. Tip: Hold your cursor over the Functions pulldown list (the one that says Muscle in the image below) and press m on your keyboard. That will get you to the "M" section, so when you click on the list you'll have much less scrolling to do.
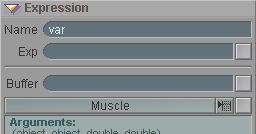
8) Fill in the arguments and apply it. Here's what the arguments are:
Obj: The bone you want to be a muscle. It's Bicep in this case.
Obj: The null object that's the "anchor" at the tip of the muscle. It's Bicep_Connector in this case.
Muscle tension variable
Muscle contraction variable
Note: Arguments 3 and 4 are not active, so just enter 0.
Here
is what you should put for each of these (since 3 & 4 aren't
active, I'll just put 0). Fill it in like this, then
apply it, by right-clicking on the ![]() button on the right of the
functions pulldown list:
button on the right of the
functions pulldown list:

| If you plan on using IK
with muscles, change the IK solving order by
clicking on the IK icon until you get the red
arrow |
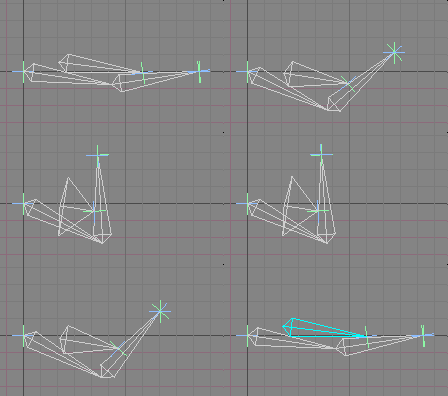
At this point, the muscle is ready to use: if you rotate the Lower_Arm bone you'll see the bone stretch and contract.
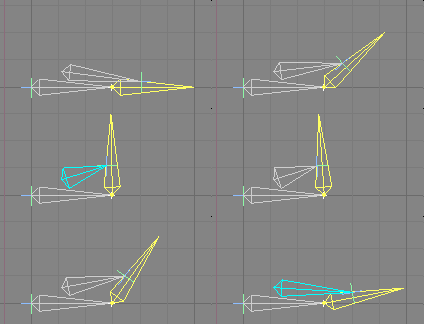
However, there are ways of adding additional control to the muscle, so lets continue...
9) To make the Y scale more pronounced, take the current Y scale and cube it (x3). This will also make the scaling into a non-linear interpolation that looks a little nicer. Add another New Variable.
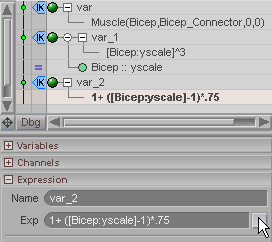
10) Select the Bicep's Y scale by pressing 8 on your keyboard or selecting it from the Channel Controls on the bottom right of the World View, then Right-click on the gray box to the right of the Buffer field. In the Exp field, add ^3 (which is "cube 3" or "3x3x3") to the end of the expression that's there ([Bicep:yscale]).

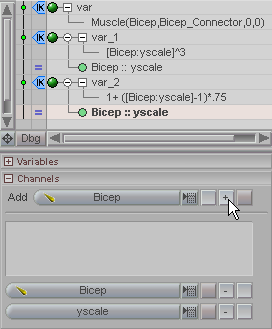
11) On the Channels
block, make sure Bicep is selected in the Add pulldown
list, then add it by pressing the ![]() button. You
will see it appear at the bottom of the block, along with
yscale in the
pulldown list below it. This means that the expression you
made in step 11 will be applied to the Bicep's Y scale channel.
If you rotate the Lower_Arm on Pitch now, you'll see the
muscle bulge very large. That's obviously too much, so now
let's give it some more control.
button. You
will see it appear at the bottom of the block, along with
yscale in the
pulldown list below it. This means that the expression you
made in step 11 will be applied to the Bicep's Y scale channel.
If you rotate the Lower_Arm on Pitch now, you'll see the
muscle bulge very large. That's obviously too much, so now
let's give it some more control.

12) To make the Y scale a little slower and controlled, create another variable and put this in the Exp field, then apply it (again, right-click on the blank button to the right of the functions pulldown list): 1+([Bicep:yscale]-1)*.75 (I'll explain what this does in a moment.)
13) Link this to Bicep's Y scale just as you linked the previous expression in step 12. (And if you plan on using IK you'll have to change the IK solving order to "after IK" for this expression too.)
Here's what that last expression does: It takes the Bicep's Y scale and subtracts 1, then multiplies it by .75, then adds 1. So, for example, if the Bicep's actual Y scale is 2, then it takes 2 and subtracts 1, which leaves 1. This is then multiplied by .75, which leaves us with .75. Add 1 and you have 1.75 as the final result. Maybe this will be easier to understand:
1+ ([Bicep:yscale]-1)*.75 if the y scale is 2
2 - 1=1
1 x .75= .75
.75+1= 1.75
Here's another example:
1+ ([Bicep:yscale]-1)*.75 if the y scale is 3
3 - 1= 2
2 x .75= 1.5
1.5 + 1= 2.5
(Remember that with math formulas, the things inside the parentheses get calculated first, thus we start with the Bicep scale and subtract 1. For more information about how expressions are broken down and calculated, click here.)
The reason for this expression is that you might want a slower, less apparent effect. Applying this expression will reduce the scaling ratio. You can't really just take the scale and subtract from it, because if your scale is 0 then you'll end up in negative numbers, which can't happen with real muscles.
Important Note: The expressions that reference and change the scale values of muscles must come after the muscle definition expression (the expression that makes the bone into a muscle). Expressions are evaluated based on the order that they appear in the Expressions List. The Y scale of the bone won't change when the arm moves unless it's a muscle, so there won't be anything to calculate if the muscle expression doesn't come before the Y scale adjuster. You can rearrange the expressions in the Expressions List and see for yourself.
A completed version of this scene (EffectTypes_Bones_Intermediate_01.fxs) is located in the Scenes\Tutorials folder. I've added IK to that scene though, so you can see what happens when you change the IK solving order. Load the scene and press play, then go to the Command tab and change the IK solving order.
Additional information:
There's more information about bones here: General Info -
Bones Bone block
Skeleton block Target
Object Options block
| Converted from CHM to HTML with chm2web Pro 2.82 (unicode) |