|
|
|---|
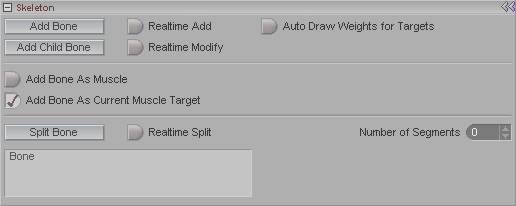
This where you begin the setup process for skeletons. This block appears when you have Skeleton (purple diamond) selected in the Item List. Note: See the bottom of this page for some animated examples of some of these buttons.
Add Bone: Adds a bone to the skeleton. This bone will not be a child of another bone in the hierarchy (although you can change that later).
Add Child: Adds a bone which is a child of the currently selected bone. (The hierarchy can be changed at any time though.)
Realtime Add: When this is on, you can click in the Viewport to add bones. A bone will be drawn with its tip being where you click. Using this feature, you can "draw" your bones into the character.
Realtime Modify: When this is on, you can click and drag the bones to any size and position you want.
Auto Draw Weights for Targets: This will automatically change the visual representation of the weights (when in W shading mode) to reflect the currently selected bone.
Add Bone As Muscle: When Realtime Add is on, turn on this button to "realtime add" muscles.
Add Bone As Current Muscle Target: If there is no target set for the current muscle, turn this on so the next bone you create will be set up as the target (connection) of the muscle. This is often used for creating chains of muscles.
Leave both buttons on if you are making a chain of muscles. This will mean that you won't have to go back and add targets.
Split Bone: Press this to split the currently selected bone into two equal halves. Note: Do not use this to split muscle bones. Or at least, "try at your own risk."
Realtime Split: When this is on, click on a bone to split it. The split will occur where you click, so you can be exact.
Number of Segments: This sets how many additional bones there will be when you split the current one.
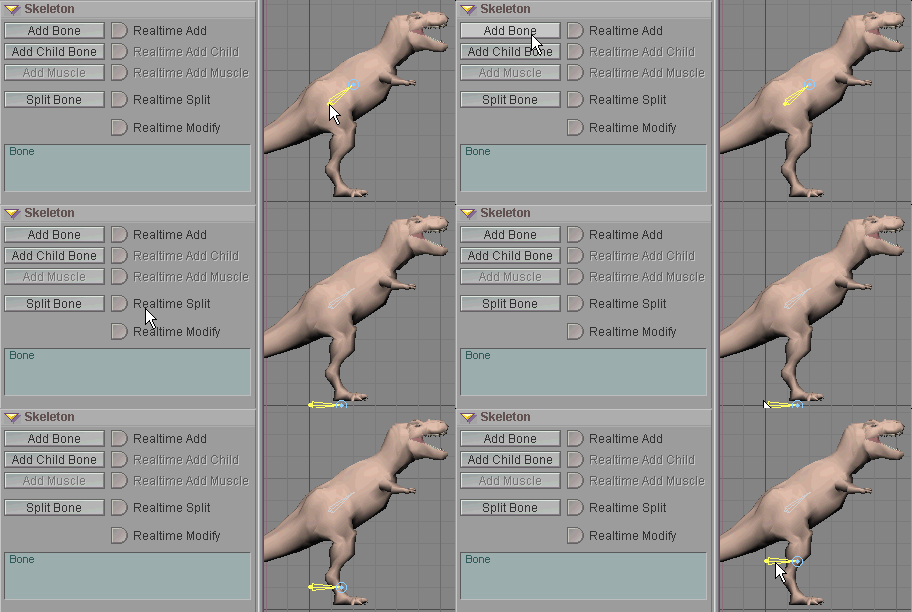
Add Bone - Click on this button to add a new bone that is not
the child of a pre-existing bone.

Add Child Bone - Click on this button to add a child to the
currently selected bone. This new
bone will appear at the tip of the parent bone (the one you
selected before pressing this button).
The child bone will have the same properties as the parent,
but they can be changed later.
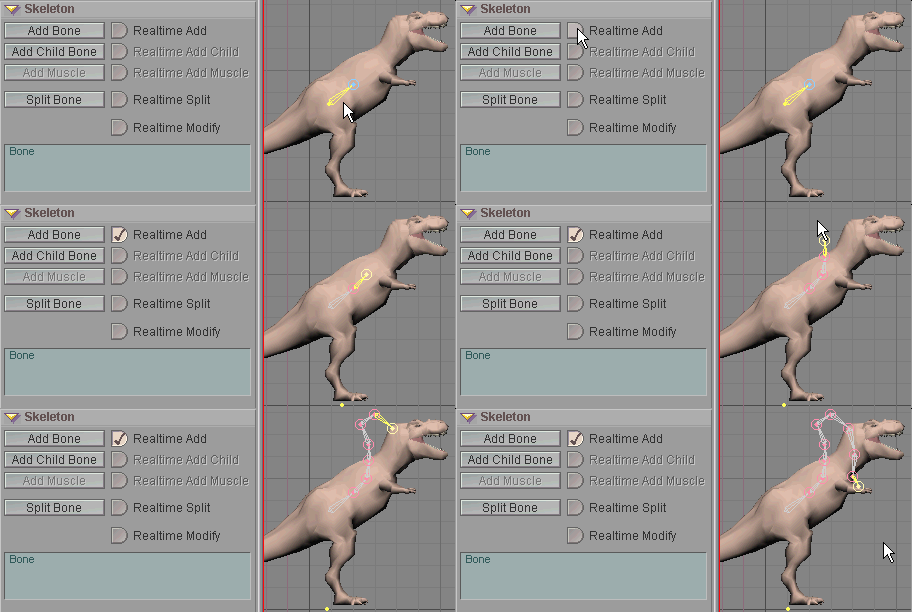
Realtime Add - Turn this on, then click in the World View where
you want to have a bone.
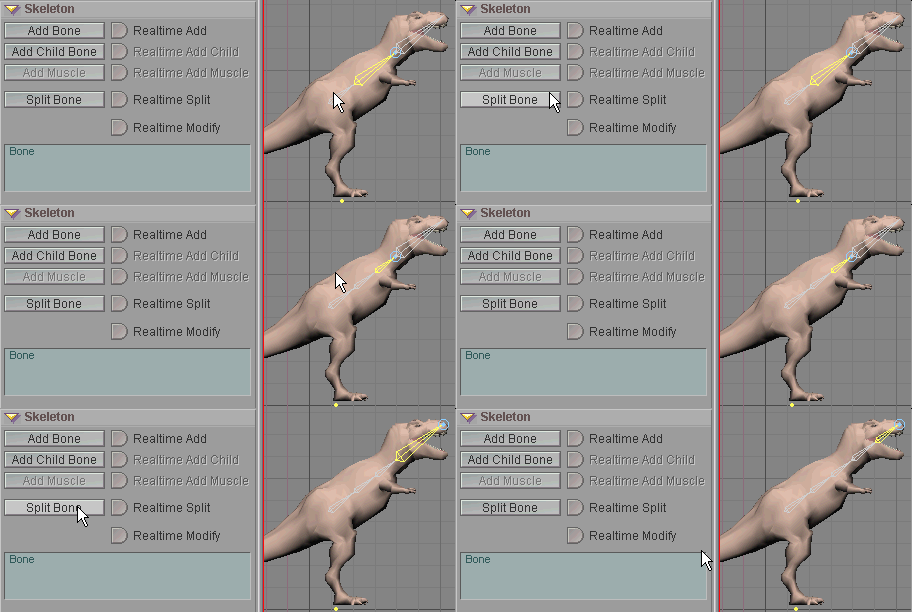
Split Bone - Select a bone, then press this button and it will
split that bone into two, right in the middle.
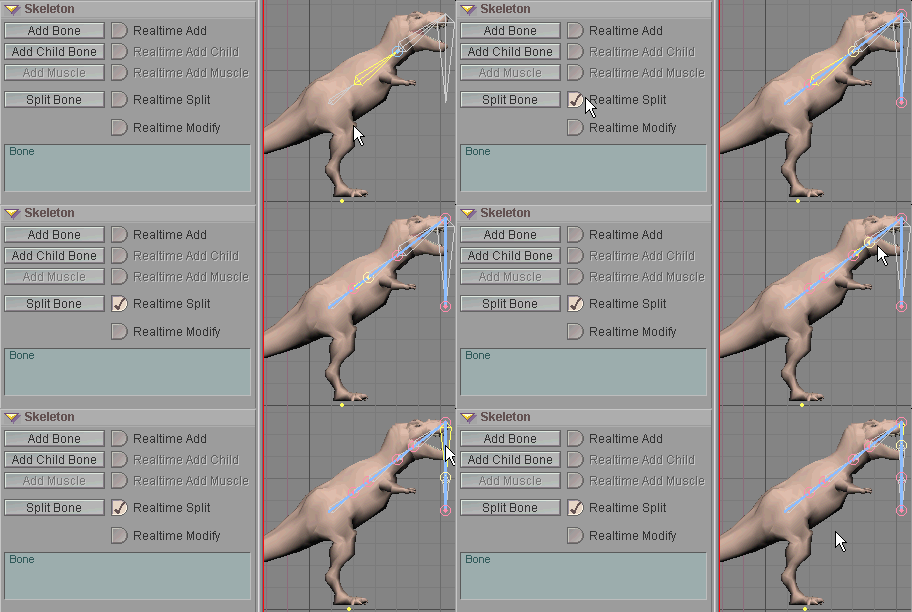
Realtime Split - Turn this on, then click on a bone and it will
split it at the place where you clicked.
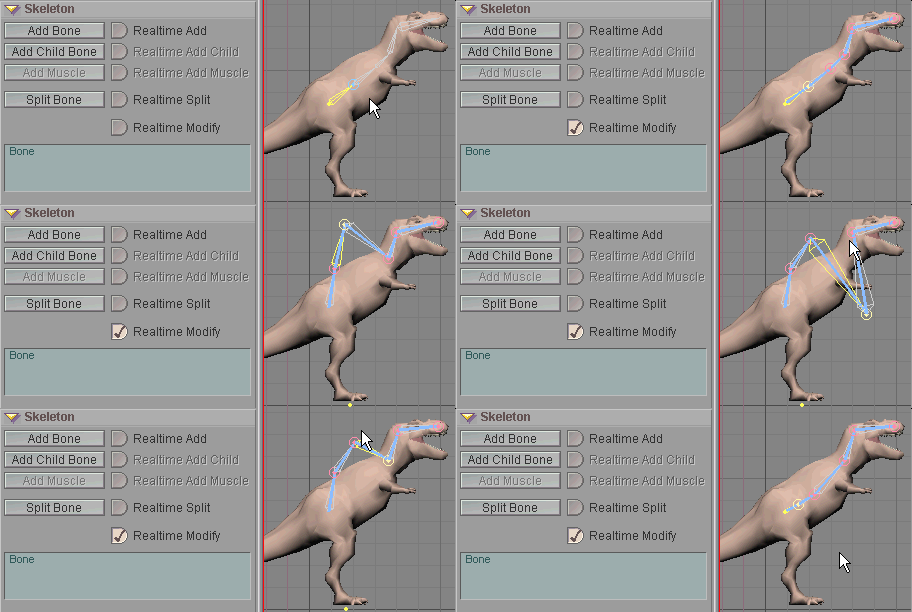
Realtime Modify - Turn this on, then click on the end of the
bone that you want to re-position.