|
M o t i o n G r a p h B a s i c s |
|---|
The Motion Graph is one of the most important parts of the messiah interface. This is where the motions and rotations of items are created and fine-tuned. It works in conjunction with the World View, Edit Sphere, Motion block, and the keyframe controls on the Edit tab.
Note: Most keyframe editing can happen on multiple keys if you want. Just drag a box around the keys, then make your modifications. See Multi-Selecting Keyframes, below.
Sizing the Motion Graph:
The Motion Graph can be sized by simply clicking and
dragging on the frame number bar. In the Camera,
Object, and Perspective view modes, the view will
shrink down in the World View as you drag the graph
up. For the isometric views (Front, Left, etc.)
the view stays the same size. Because there is a
certain amount of CPU time used in calculating and drawing the
graph itself, you can sometimes improve the playback speed of an
animation by dragging it all the way closed. I know you'd
think that the smaller the OpenGL is, the faster it will play, but
in this case, gut feeling is wrong.
Moving and Zooming the Motion Graph View:
-
Moving: Hold down ALT and left-click drag within the graph to position it where you want it.
-
Zooming: Hold down ALT and SHIFT and left-click drag within the graph. Drag up and down to zoom the value, and drag left and right to zoom in time.
Mouse buttons &
Keyframes:
Each mouse button does something different, and it's a good idea to
be familiar with each. Here's the breakdown:
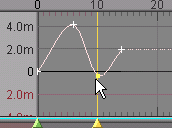
Left Mouse Button (LMB): The LMB is used for selecting keyframes and adjusting their value (up and down on the graph).
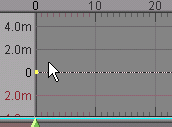
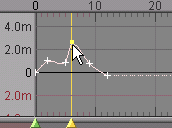
Adjusting the value with LMB.Middle Mouse Button (MMB): The MMB is used for two things. If you click on a frame where there is no keyframe, one will be created. If you click on an existing keyframe, you'll be able to drag it in value (up and down) and time (left and right).
Drawing keyframes (left) and moving keyframes (right) with the MMB.
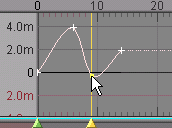
Keys can also be created by middle-clicking in the drag area.Right Mouse Button (RMB): The RMB is used for selecting keyframes and adjusting their time (left and right on the graph).
Moving keyframes with the RMB.Note: Using the MMB and RMB you can move one keyframe past another in time.

Multi-Selecting
Keyframes:
To multi-select keys in the Motion Graph, drag a box around
them. You can add or remove keys from the selection by just
dragging a box around them, as you can see in the animation
below.
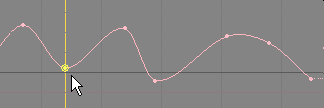
Multi-selecting keyframes.
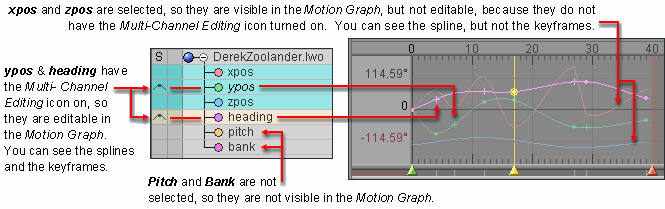
Multiple Curve Editing:
To make more than one channel appear in the Motion Graph,
open the item's channels in the Item List and multi-select
the channels that you want to have appear in the Motion Graph (SHIFT select or CTRL select). If
you want, you can have channels appear in the Motion Graph but not be
editable. To do that, turn off the Multi-Channel
Editing icon in the Item List (see image below). If this
icon is on, then any time this channel is
selected, even if it is not the highlighted-yellow current channel,
it will be editable. The image below shows some channels with
the icon on (editable) and some with it
off (not editable).
Cool Tip: If you have some channels that you want to always appear together and be editable, make them a Group (click here for info) and turn on the Multi-Channel Editing icon for them. In the Group, turn on Auto-Select. So what will happen is that any time you select one of those channels, all of them will become selected (because of Auto-Select) and they will all be visible and editable in the Motion Graph (because of the Multi-Channel Editing icon).
Important Note For Longtime messiah users: In versions of messiah prior to messiah:animate 4.5 and messiah:studio 2, the Multi-Channel Editing icons were off by default. Now they are on by default. They still work the same way, but people preferred them to default to on.
Motion Editing In World
View:
Remember that motion can be edited in the World View too,
even when the animation is playing. Just click on a keyframe
and move it around. This works in conjunction with the
Frame Jump setting on the Key/Frame Editing module.
Tension, Bias, and Continuity:
These controls adjust the shape of the motion spline, and therefore
the timing of the motion. You can adjust the Tension, Bias, and
Continuity from the Spline
Block, or in the Motion Graph.
Here is how to adjust them in the Motion
Graph:
Tension: CTRL drag on the keyframe.
Bias: SHIFT drag on the keyframe.
Continuity: CTRL-SHIFT drag on the keyframe.
Bezier Handles:
Bezier handles (tangents) are a way of controlling the shape of
the motion spline, just like Tension, Continuity, and
Bias are. The advantage of Beziers is that
they're more visually interactive and intuitive. To activate
the Bezier handles for a keyframe, select the keyframe and
choose Bezier from the Curve pulldown on the
Spline block. The curve types can be changed for
multiple keys too by just multi-selecting keys and changing the
curve type.
Adjusting Beziers with broken handles (or "tangents") for all keys.
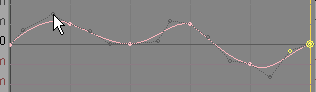
By default, the handles on a keyframe are connected, so when you move one side up and down, the other side moves too, like a see-saw. If you want, you can "break" the handles so you can move each side individually. To do that, use the Handles buttons on the Spline block (see below) or hold CTRL and click on the handle. To re-connect them, do the same thing, or turn off the button on the Spline block. The image above shows broken handles.

Additional Bezier Info:
Here are some more things you might want to know about Bezier
handles...
If you have multiple keys selected when you select Bezier from the Curve pulldown list, you will be changing the curve type for all of those.
If you have multiple keys selected while you drag a handle, you will be dragging the relevant handle on all of them. Here's how the mouse will work:
Left Mouse Button - Makes relative changes. So the relative positions of the handles will stay the same, but they will each move by the same amount.
Middle Mouse Button - Makes absolute changes. So all selected keys will have the exact same handle positions.
Right Mouse Button - Modifies the slope only.
Transform & Distort Range will work properly under normal circumstances with Bezier, but:
Distort may not produce the desired results when you're performing a distortion.
The preview of the curve may not be accurate, but the final transformation will be fine.
You will lose the curve handles if you drag a key in time before a non-Bezier key. This is not a bug; key types are controlled by the next key (incoming key system). If you drag the key back to the original position, the handles will return but may be distorted. This same behavior may be present when you move a key beyond the first or last key.
You can set it so only the currently selected keyframe will show its Bezier handles, or so all keyframes with Bezier handles will show. The setting for this is on the Edit tab on the Key/Frame Editing block. The option is called Show Handles.
Additional Information: Motion Graph Dope Sheet