|
T u t o r i a l - Bones |
|---|
Skill Level: Beginner
Bones are used to deform objects. Setting up a skeleton is very easy, and the great thing is that it's also easy to modify them even after you've done some animation. Each character will have different demands and bone setups, so rather than do a full tutorial, here's a quick rundown on the steps involved in putting bones into a character and getting them positioned.
Creating A Skeleton:
Note: In the images I've added a light, but that's
not part of this tutorial.
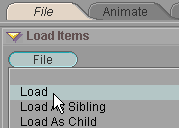
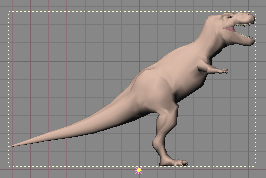
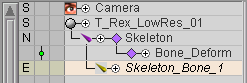
1) From the File tab, load T_Rex_LowRes_01.lwo object from the Objects\T_Rex\ folder.
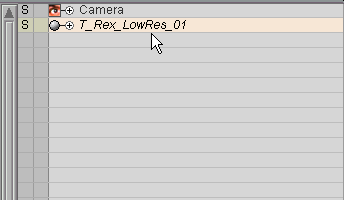
2) Go to the Effects sub-tab on the Setup tab and in the Item List, select the T-Rex object (if it isn't already selected).
3) Select Bone_Deform from the pulldown
list and press the ![]() button.
When you do that, you'll see that it puts a couple of items into
the T-Rex's hierarchy called Skeleton andBone Deform. ("Skeleton" can rename it later if you'd
like.) These items are the Effect (Bone_Deform) and
Tool (Skeleton).
The bones, which you'll add in a moment, are the sub-Tools.
For more information about Effects, Tools and sub-Tools, click
here.
button.
When you do that, you'll see that it puts a couple of items into
the T-Rex's hierarchy called Skeleton andBone Deform. ("Skeleton" can rename it later if you'd
like.) These items are the Effect (Bone_Deform) and
Tool (Skeleton).
The bones, which you'll add in a moment, are the sub-Tools.
For more information about Effects, Tools and sub-Tools, click
here.
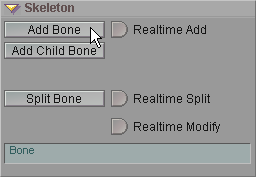
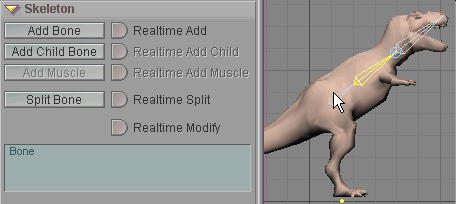
4)Now it's time to add the actual bones. Select Skeleton in the Item List and you'll see the Skeleton block appear at the bottom. Click on the Add Bone button. You'll see that it puts a bone in the Item List and into the World View.
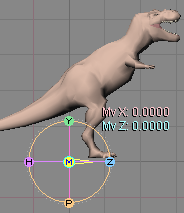
5)Now grab the bone in the World View with the M control in the middle of the Edit Sphere and position it to where you want it. Usually the Pelvis is the main parent for all of the bones, so position it there.
6) Now just add more bones. This is just a "getting started" tutorial so I won't go into a complete setup, but here are a couple of ways you can add more bones:

Add Bone - Click on this
button to add a new bone that is not the child of a pre-existing
bone.
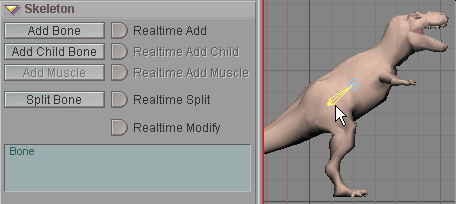
Add Child Bone - Click
on this button to add a child to the currently selected bone.
This new
bone will appear at the tip of the parent bone (the one you
selected before pressing this button).
The child bone will have the same properties as the parent,
but they can be changed later.

Realtime Add - Turn this
on, then click in the World View where you want to have a
bone.
Split Bone - Select a
bone, then press this button and it will split that bone into two,
right in the middle.
Realtime Split - Turn
this on, then click on a bone and it will split it at the place
where you clicked.
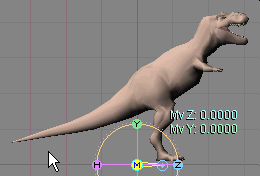
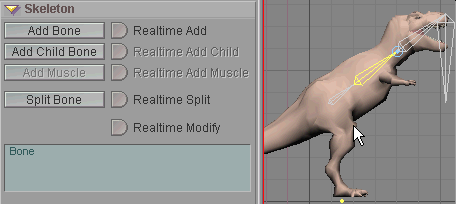
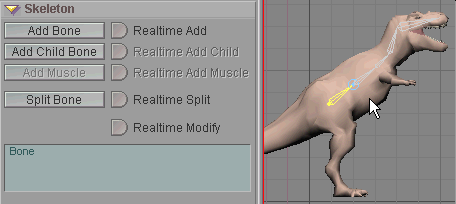
7) Now all you have to do is fine tune the positions of the bones. There are four ways you can do that. First is just using the Edit Sphere. Second is using the Channel Controls on the lower right of the World View viewport. Third is using the controls on the Rest block. But the fourth way is often the best way. That's using the Realtime Modify option. The image below shows the Realtime Modify option in action:
8) Once your skeleton is set up the way you want, you can switch out of Setup and begin animating, or setting up IK or other things, such as expressions.
Remember though that you can always re-enter Setup and fine tune the bones-- even after you've animated them. Just make sure the Transform Keys button is on if you want to keep the animation the same.
Additional information:
There's more information about bones here: General Info -
Bones Bone block
Skeleton block Target
Object Options block
| Converted from CHM to HTML with chm2web Pro 2.82 (unicode) |