|
T u t o r i a l - Particles |
|---|
Skill Level: Beginner.
Particles are, well, particles. There are tons of uses for them, anything from pixie dust (like a certain flying fairy in that heavily copyrighted movie about a boy who never grows up, but loses his shadow) to smoke trails to water fountains to, well, lots of other things.
The project:
One of the most common effects in movies is a bouncing ball with
particles showering out of it, so this is what we're going to do
here. OK, it's not really a common effect.... OK, it's
actually not in any films. But it's still a good learning
project. And now that I think of it, I guess you could use
this tutorial if you ever have to do a shooting star or space
capsule re-entry. So it IS good to know. So there.
Look, up in the sky!!!
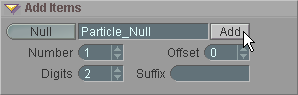
1) Set the Out point to 200 so when you play the
animation it will be a few seconds long. On the Add
block on the File tab, add a Null called
Particle_Null. This will be, as the name suggests, the null that
controls the Particle effect. The Particle
effect is added to a null, not to an object.
The reason we add the Particles effect to a
Null instead of to the object itself is that it needs an
emitter object. Doing it this way will allow you to keep the
setting of the particles system the same, while changing the object
over time to different objects if the animation requires
it.
2) On the Effects sub-tab on Setup, select Particles from the pulldown list and add it to the Particle_Null.
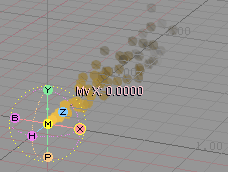
3) Click over to Animate and press play. You'll see particles spraying out from the null (and if that's not exciting, I don't know what is). But now let's take it a step further.
4) Load SmallBall.lwo from the Objects\Tutorial_General folder and rename it Meteor so it's cooler (or hotter) and you'll feel more thrilled.
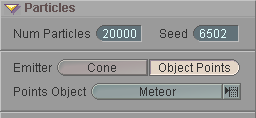
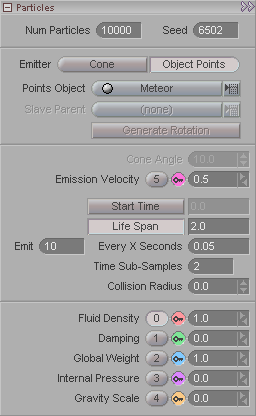
5) On the Animate tab, select Particles in the Item List and you'll see the Particles block appear. Change the Emitter setting to Object Points and select Meteor from the Points Object pulldown. What this does is cause the points on the object (the ball) to become the "emitter," which is the place where the particles spout from.
6) Change the Emission Velocity setting to 0.5 so the particles won't shoot out too fast, then change the Emit setting to 10 so there will be more particles to see, then press play with the view set to P (perspective). The particles are now emitting from the points on the ball. Now set the view to T (Top) and you can see that it's the points that are emitting the particles.
7) Now switch to the perspective view (P) and animate the ball bouncing up and down. You can then try adjusting some of the parameters for the particles, such as the Global Weight and Fluid Density to get an idea of how those things affect the particles.
So that's all for now; that's the basics of setting up Particles! A completed version of this scene can be found in the Scenes\Tutorials folder. It's called EffectTypes_Particles_Beginner.fxs. There is also an interesting scene there called EffectTypes_Particles_Beginner_Collision.fxs, where I turned on Collision for the particles and set the Meteor as the collision object.
Additional information: General Info - Particles Particles block Collision Objects block Create (Force) Force
| Converted from CHM to HTML with chm2web Pro 2.82 (unicode) |