|
T u t o r i a l - MorphBlender |
|---|
Skill Level: Beginner.
Introduction:
MorphBlender can be used for a lot of things, but it will
probably get the most use as a facial animation tool. With
that in mind, here is a basic tutorial for setting up a
MorphBlender face. A completed version of this scene
is located in the Scenes\Tutorials folder. It's called
EffectTypes_MorphBlender_Beginner_01.fxs.
The part that tells you how to do
it:
Note: You may want to add a light too, so you
can see better. Add it from
Setup-->Items-->Add.
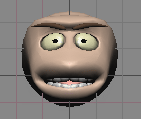
1) Load Smiler_base.lwo from the Morphblender_Tutorial folder. Switch to the front view and zoom in if necessary. You may also want to move the camera out of the way. Now turn on MetaNURBS for the object (press TAB).
2) Go to the Effects
sub-tab in Setup and select MorphBlender from the
pulldown list, then click ![]() .
.
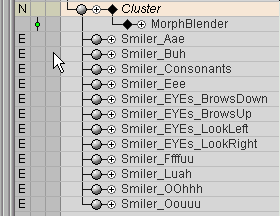
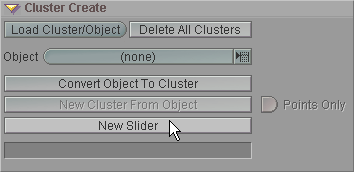
3) You'll notice that after you added the MorphBlender effect, the Cluster Create block appeared below the Item List. Go there and click on Load Cluster/Object, then select all of the morph targets (everything except Smiler_base.lwo and Smiler_baseMetaformLevel2.lwo) and load them.
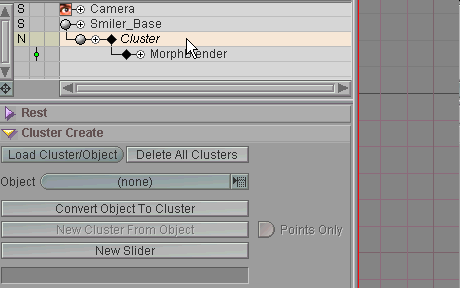
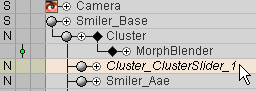
4) Hold down CTRL and click through the item visibility icon for Cluster until you get to the N setting. This will hide all of the morph targets in the World View. You can also Hard Lock all of the targets since you won't need to touch them. Hint: When you change the visibility setting, left-click once, then right-click once. In this instance, that's the fastest way to get to N.
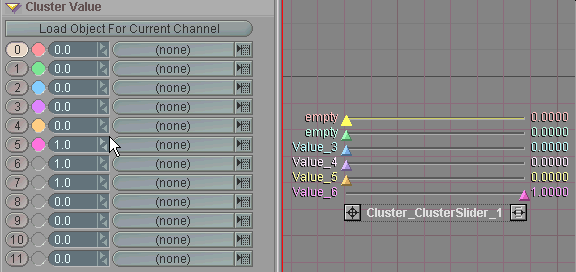
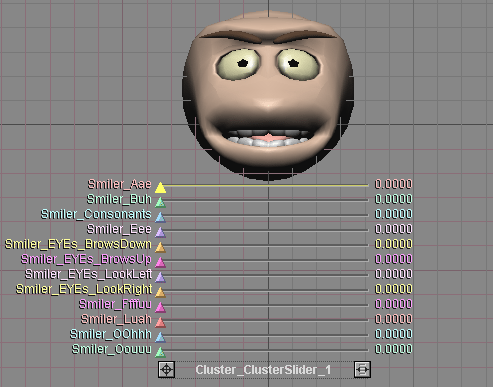
5) Now let's go back down to the Cluster Create block. Click on New Slider. This will put a cluster slider in the Item List and bring up the Cluster Value block.
6) Now it's time to tie the morph targets to the slider channels. There are a couple of things you need to do here (for this tutorial anyway). First, make channels 6-11 visible. To do this, right-click on the Key Modifier buttons (the circles next to the channel numbers). When you do, the color will turn on and the channel will become visible on the slider itself. Next, set channels 6, 7, and 8 down to 0 in the numeric field.
7) Now it's time to assign the targets to the slider channels. Just use the pulldown lists to select which object should go with which slider. When you are finished, exit the Setup.
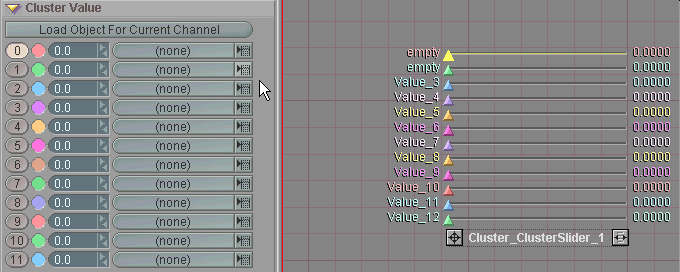
8) Three of the slider channels will be set at 1 (all the way to the right). Move those to 0 (the left).
You are now ready to animate! Just position the various slider channels so the face is in a pose you want.

Recap:
MorphBlender is a very simple effect to use. The only
tricky part is creating the morph targets themselves. To use
MorphBlender, select the object you want to apply it to, then add
the effect, load the targets, then create a slider and assign the
targets to the slider channels.
Additional information:
General Info - MorphBlender Animate -
Metamation block Setup - Cluster Create
| Converted from CHM to HTML with chm2web Pro 2.82 (unicode) |