
|
T u t o r i a l - FlexMotion |
|---|
Skill Level: Beginner.
FlexMotion (spline IK) is one of messiah's most useful innovations. It can be used for everything from tentacles, to snakes, to lips, to... uh... well, to other things that FlexMotion would be good for. (Actually, a lot of people use it for facial animation-- lips and eyebrows, etc.) It's similar to Flex, but rather than controlling the geometry (character mesh) directly, it controls bones, and the bones control the geometry.
This Tutorial Will:
FlexMotion is just as easy as Flex, but it has the extra
step of adding bones.
What You'll Do Here:
What you'll do here is add a simple skeleton to a character then
add the FlexMotion effect to control it. I know, I
know, it's a dream come true.
So let's begin...
Part 1 - The
Skeleton
Note: You may want to add a light too, so you
can see better. Add it from
Setup-->Items-->Add.
1) Load Wormler_LowResB.lwo from the Objects/Wormler folder. This is a MetaNURBS-able object, so if you want, you can turn them on (press TAB).

2) Make sure that Wormler_LowResB is selected in the Item List, then go to the Setup tab and click over to the Effects sub-tab.
![]()
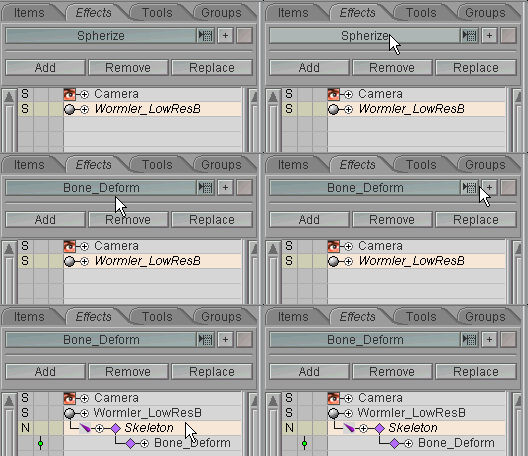
3) Select Bone_Deform from the effects pulldown
list then press ![]() to add the effect to the Wormler
mesh. You'll see the Bone_Deform effect and the
Skeleton tool appear in the Item List.
Telephone all of your friends and let them know.
to add the effect to the Wormler
mesh. You'll see the Bone_Deform effect and the
Skeleton tool appear in the Item List.
Telephone all of your friends and let them know.
4) On the Skeleton block, press Add Bone once. Position that bone by moving it up on Y so it's in the middle of the head, then adjust the length to 0.5 (or roughly). You can adjust the length by grabbing the end of the bone or on the Bone block.
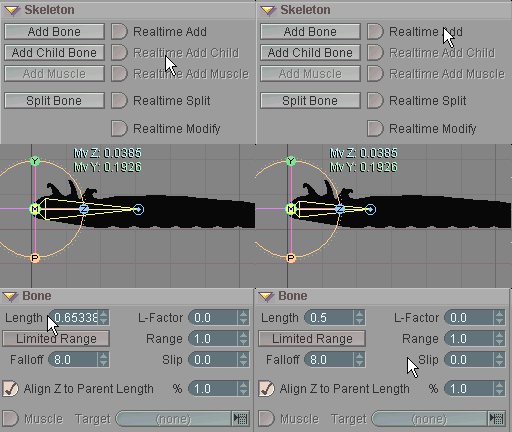
5) Now press Add Child Bone six times. That will create the rest of the skeleton. As you can see though, the bones don't really follow the body. This is easy to fix. Select the first bone and adjust the Pitch so the last bone lines up with the tail.

That's all there is to setting up the skeleton. If you switch to Animate now you can try rotating some of the bones and you'll see that they affect the object. After you've tried that, reset the bones you played with, then go back to Setup.
Part 2 - FlexMotion
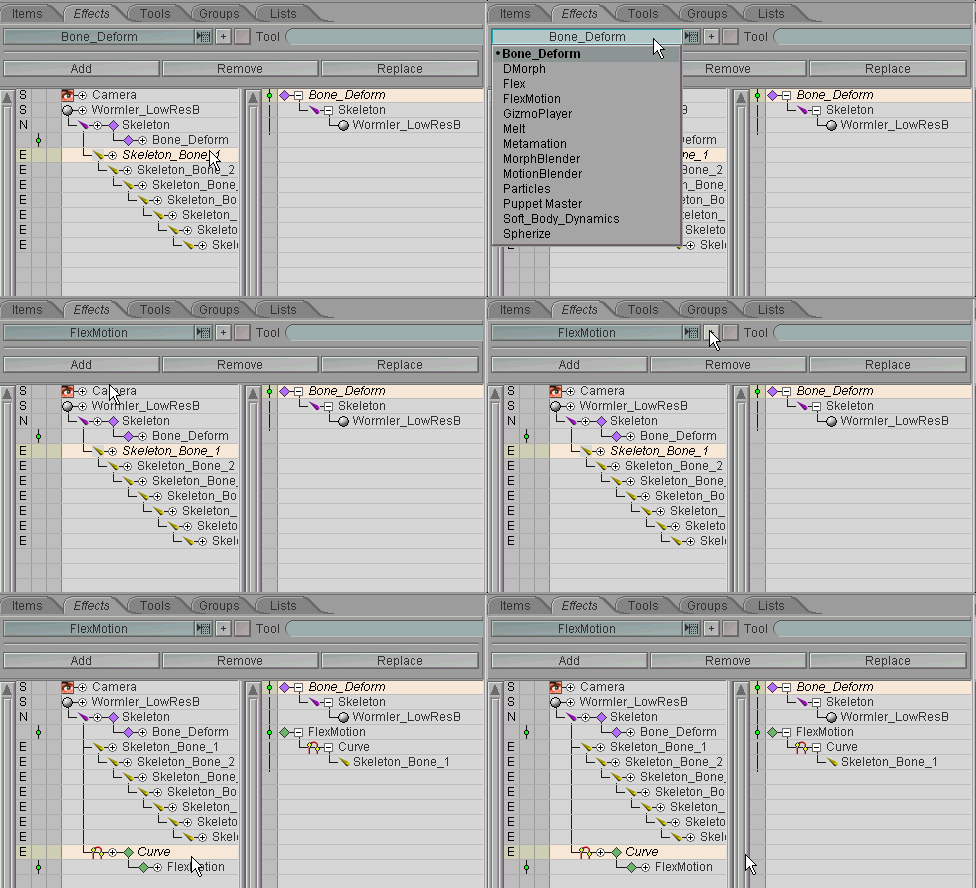
6) On the Effects sub-tab, select Skeleton_Bone_1 then select
FlexMotion in the effects pulldown list and press ![]() . You'll see the FlexMotion effect and
Curve tool appear in the Item List. But after
seeing the Bone Deform effect and Skeleton tool
appear five minutes ago this isn't very exciting.
. You'll see the FlexMotion effect and
Curve tool appear in the Item List. But after
seeing the Bone Deform effect and Skeleton tool
appear five minutes ago this isn't very exciting.
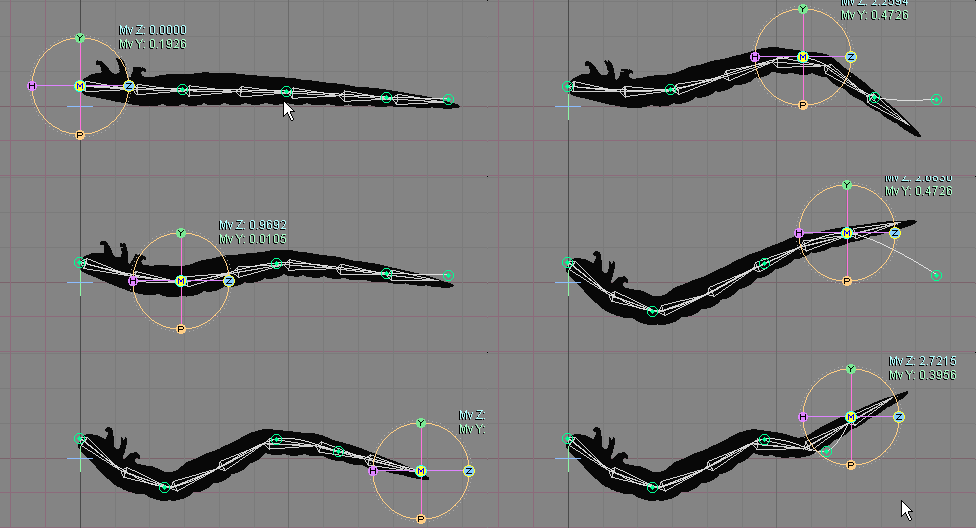
7) With Curve selected, press Add Point on the Curve block. Now position it by moving it up on Y so it's at the tip of the nose of Mr. Wormler.

8) Now add the rest of the control points. Turn on Point Add so you can just click where you want them to be, then go ahead and create them. Don't worry about being precise, you can adjust their positions afterwards if you want.

Guess what? You're done. Click over to the Animate tab and grab one of the points and move it around. You'll see that the bones follow it. There are, of course, other settings that will give different results, but some of those are covered in the Intermediate and Advanced tutorials.
One last thing:
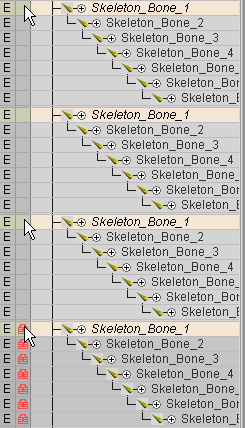
Since you animate this character with the Curve points, you don't
want to accidentally move the bones, so it's a good idea to turn on
Hard Locking for them. Hold down CTRL and
right-click in the box to the left of Skeleton_Bone_1.
A completed version of this scene (EffectTypes_FlexMotion_Beginner.fxs) is available in the Scenes\Tutorials folder.
Additional information:
There's more information about FlexMotion here:
General Info -
FlexMotion Curve block
MotionBend block Point block
| Converted from CHM to HTML with chm2web Pro 2.82 (unicode) |