|
|
|---|
Note: This block appears when Curve selected in the Item List.
Curve is a Weight Tool.
Field of Influence (pulldown): There are six types of fields that can be produced by the curve. Use this pulldown to select which type you want. The choices are:
-
Infinite - The Curve is the strongest point of influence, and it drops off from there, based on the settings you have for Strength and Decay. In other words, Infinite is not bound by the radius of the Curve but is allowed to falloff to 0.0 naturally.
-
Finite - The Curve is the strongest point of influence and it drops off outward from there at a rate that's based on the settings you have for Strength and Decay. In other words, unlike Infinite, Finite will stop its effect at a specific place-- anything outside it will not be affected.
-
Linear - The Curve is the strongest point of influence and it drops off from there based on the settings you have for Strength only. The decay rate is linear, from full influence to no influence.
-
Constant - The Curve has a constant value, from the center out to the edge of the influence. You can adjust the intensity using the Strength setting, but it will apply that exact setting to everything within the influence.
-
Connected - When a point is within the Curve field, its connected edge points will be set to the Constant value as well. This makes it easy to deal with points that are overlapped. So Connected behaves like Constant except that in addition to all points inside the sphere getting a constant weight value, all points that are directly related to any polygons intersected by the sphere are also given a weight of "Constant Value".
-
All Connected - When a point is within the Curve field, all connected edge points will be set to the Constant value as well. This makes it easy to isolate, say, the eyes in a model (provided that they are not connected to the rest of the points in the model). In other words, All Connected assigns the constant value to all points connected in any way to polygons intersected by the field.
Polarity: The default is + (positive) which will exert an influence on your object. Setting it to - (negative) will exert a negative influence on your object. You can use this to prevent an area of your object from being influenced by another Curve.
Type: Choose between Vector and Rail.
-
Vector -This option handles the curve as vectors (the default). In most cases this is sufficient, but it may exhibit flipping that you can't counter even with the "Up Vector" option.
-
Rail - This option handles the curve as a physical rail or rod. This means that it won't exhibit any flipping. However, it may cause additional rotation along the curve as it would be in the physical world unless you twisted it, yourself, to maintain a specific orientation along the curve.
Precision: How precisely the data (geometry) will match the curve. Usual settings are from 0 to 6. Higher than 6 will not really give better results, but it will take longer to compute.
Draw: Choose whether you want the curve to be drawn as a simple line, or as an approximation of the weight field (sort of a 3D line, like a tube). The dimensions of the Field are dependent upon the height and width settings for the actual points (Point block).
Strength: Sets the strength of this Curve at its strongest point, its center (the line itself). When you have a Constant influence, this sets the overall strength. When you have any of the other influence settings it will set the initial, or highest strength (the line itself).
Decay: When you have Infinite or Finite chosen as your Field of Influence, this will control the falloff of the influence of the Curve. In other words, the way it will go from full influence to zero influence. If you are set to Constant or Linear, this setting will have no effect, since those two settings have built-in decays-- Constant has 0 (zero), and Linear has a linear falloff.
Constant Value: This is the Strength setting for the influence when you have Constant selected as the Field of Influence.
Min/Max: This acts like a clamp. For example if you set the Min (minimum) to .25 and the Max (maximum) to .75 it will clamp the values of the field to those values. The normal setting is Min 0 and Max 1.
Scale To MinMax: This will "stretch" the settings if the Min/Max are larger than the actual settings. So if the Strength is set to 1.5 but the Max is set to 2.5 it will "stretch" the Strength setting to 2.5.
A Curve has a rest length, just like bones do; for Curves it is the distance between the points. So if you animate the points and move them farther away or closer to each other you might want have the geometry react to that "squashing" and "stretching." That is what the following section is for.
Squash: Turn this on to allow the item being influenced by the curve to be "squashed" (compressed) when the overall length of the curve deforms to less than its original length. So as the curve (or portion of the curve) gets shorter, it gets fatter.
Stretch: Turn this on to allow the item being influenced by the curve to be stretched when the overall length of the curve deforms to greater than its original length. So as the curve (or portion of the curve) gets longer it gets thinner.
Scale Point Width: When this is on, the curve will scale along its width when squashing and/or stretching. When it is off, the points won't react along the width.
Scale Point Height: When this is on, the curve will scale along its height when squashing and/or stretching. When it is off, the points won't react along the height.
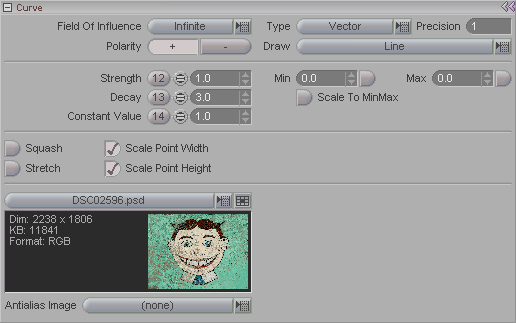
Image (pulldown): Choose an image to be used for weight projection (if you want). The image is used as an additional weight along the length of the curve. Think of it as the image being wrapped around the curve field and being projected onto the target points. The resultant value is factored with the standard curve values to produce some very dynamic weighting. What's interesting is that this weighting is also taken into account when used with TextureMap (messiah:studio only).
Antialias Image: Choose between Bilinear and Bicubic antialiasing.
-
Bilniear - Antialiases by averaging the pixels above, below, left and right of a given pixel.
-
Bicubic - Antialiases by averaging the pixels above, below, left, right, and on diagonals from a given pixel.
See also: Curve Options and Point