|
T u t o r i a l - Cycle Branch - For Poses |
|---|
Skill Level: Intermediate
Linking Hierarchical Poses To Sliders
Introduction...
CycleBranchMorphAddFrame is one of four similarly named
expression functions and they are extremely powerful, as you'll
see. What they do is allow you to store poses for entire
hierarchies, then put the character into those positions just by
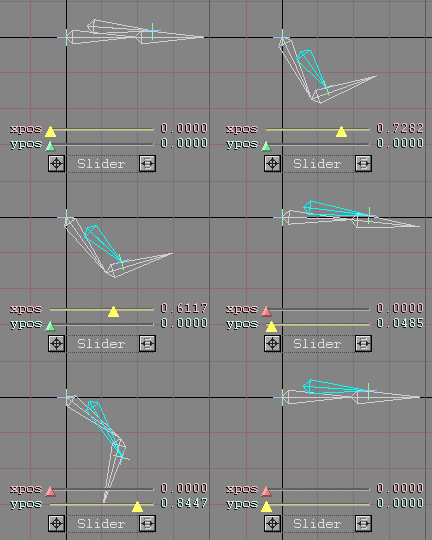
moving a slider. Like this:

The way it works is that you create poses in negative frames (-1, -2, etc.) then link the poses for those frame numbers to a slider, one frame per slider channel. You may be wondering why you would want to use this since it's basically the same as MotionBlender but more complex to set up. Well there are reasons. For example, you may want to override the effect, or combine it with other expressions or scripting processes.
What it's good for...
Lots of people use this for facial animation. You can see an
example of it in action by loading the Face_Setup.fxs scene in the Scenes/Samples folder. It's
also good for putting your character into generic poses, like
sitting, standing, etc. And of course, its use for
non-characters is equally limitless.
Getting ready...
1) Set your view to Left, then load the scene called
CycleBranch_Starter_Scene.fxs from the
Scenes/Tutorials folder. This will save us a lot of
time as opposed to creating a whole new setup.
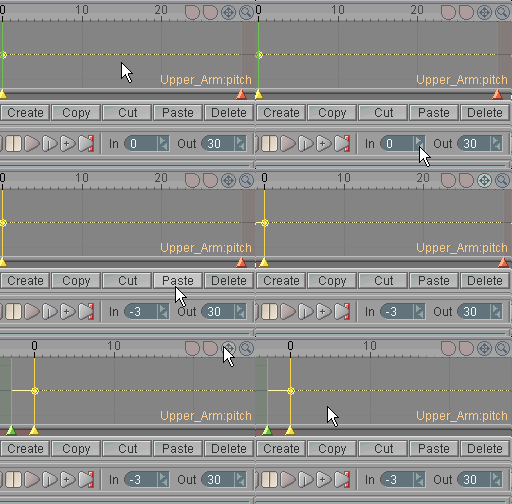
2) Set the In point to -3 (it's at 0 right now), then move the graph over so you can work with the negative frames. To do this, just click and drag on the move tool to the bottom right of the graph. Like this...
Posing...
4) Go to frame -1 and pose the Upper_Arm and Lower_Arm into a position you
like. Now put them into different poses at frames -2 and
-3.

5) Set the In point back to 0.
![]()
The Slider and Expressions...
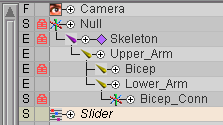
6) On Add Items block on the File tab, add a
Slider.
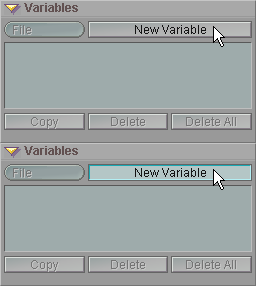
7) Go to the Command tab, and on the Variables block, add a New Variable. Drag it to the bottom of the list if it's not there already.
8) On the Expression block, select CycleBranchMorphAddFrame from the functions pulldown list. There are five arguments to fill in for this function. Here's what each of them are:
The root object of the hierarchy you want to apply the pose to.
The root object of the hierarchy that you're pulling the poses from. This can be the same as argument 1, or another one, as long as it has the same hierarchy.
Which channels should be affected.
Frame number that the pose is at. (The pose of the object in argument 2.)
The variable of how much the pose will be applied. 0 is not at all, and 1 is 100%. Usually you'll use a slider here.
Here's what you'll fill in now:
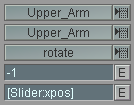
9) Apply the expression and you'll see it appear up in the Expressions List. Now lets make the expression for frame -2. Each frame (pose) will need its own expression, but as you'll see, that's extremely easy and quick to set up.
On the Variables block, click on Copy twice. You'll now have two copies of your expression up in the list. All you need to do now is modify them.
10) Select one of the copies, and in the Exp text field, change the frame number (which is -1 here) to -2, then change the slider channel (xpos) to ypos, for the Y position channel of the slider. Press Enter when you are finished. Now do the same thing for the last copy, changing the frame to -3 and the slider channel to zpos.

Changing the first copy to frame-2 and the ypos of the slider.
Here's what the final expressions list should look like:

The Conclusion...*
Now you're ready to animate using the slider. Just make sure
you're at frame 0 or higher, then move the sliders and you'll see
the arm go into the positions you set up.
If you want to add more positions, just go to another negative keyframe, position it how you want it, then copy & modify the expression like you did in step 10. It's that simple! When a slider is at 1, the motion is completely controlled by the expression, but when it's anything less, you can keyframe the hierarchy as normal and blend between expressions and normal.
This tutorial used regular CycleBranchMorphAddFrame, but you can use CycleBranchMorphFrame too, the difference being that it won't be an additive blend between the different positions. The setup is the same. If you want to see what that looks like in this setup, just edit the expressions in the Exp field and remove the "Add" in the function name, then press Enter.
A completed version of this scene, Expressions_CycleBranch_Pose_01.fxs, is located in the Tutorials\Scenes folder.
* No, that doesn't mean a hit on the head.
Additional information:
General Info - Expressions General Info -
Functions General Info -
Sliders
| Converted from CHM to HTML with chm2web Pro 2.82 (unicode) |