|
MotionBlender |
|---|
What is MotionBlender?
MotionBlender is similar to the CycleBranch family of
expressions. The way it works is you pose your character at a
certain frame, then tie its position at that frame to a slider so
no matter what frame you go to, when you turn the slider all the
way up, the character goes into that position. It works with
any hierarchy, such as bones, objects, Flex &
FlexMotion points, etc. It will also work for any
individual items, like the Camera or nulls, objects, etc.
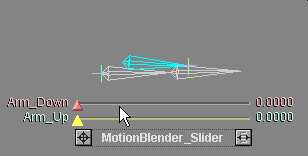
(The blue bone is a muscle. In case you were curious.)
What are some uses of MotionBlender?
There are really countless uses, but the most common uses will be
for facial animation using bones instead of morphs, and basic
character poses (standing, sitting, etc.). Naturally, it can
be used for non-characters too, and once again its uses are
unlimited.
Bones for facial animation and lip-synch?
Once bones are placed in the face of a character (including
muscle bones if you want), it's easier to put the face and
mouth into new positions from there than in a modeling
program. Attach those face positions to sliders, and you have
one of the most flexible facial animation systems available.
Not only can you create additional "targets" on-the-fly, but you
can tweak and fine tune the ones you already have.
What's the difference between MotionBlender and
CycleBranch?
Using the CycleBranch functions will give you more
flexibility about when (on what order) the calculations are
applied. They'll also allow you to attach animation to
the sliders instead of individual poses (see the Tutorials
section). But the advantage of MotionBlender is that
it's much quicker and easier to set up, particularly for people who
may be intimidated by using expressions. Once you have the
poses set, you can use either method, and you can even switch if
you change your mind. Just delete the effect or the
expressions and apply the other method instead (don't delete the
poses themselves, of course).
What frames do I put the poses on?
Poses can go onto any frame you want. It's generally a good
idea to put them on negative frames though because you aren't
likely to change them over the course of the animation.
For example, lets say you like the character's pose at frame 10 so
you attach that to a slider and use that pose several more times
using the slider. Now you change your mind about frame 10
because the character needs to be sitting instead of
standing then. Well, if you change the pose at frame
10, it will change for all of the other frames that use that
pose! It's better to copy the pose at frame 10 to a negative
frame and attach that to a slider instead. That way
you are free to change the final frame 10 without affecting a pose
that might be used elsewhere. (See "Any Tips?" below for info
about copying poses and frames.)
Where should MotionBlender come in the Effects List?
Generally speaking, if you're using bones MotionBlender
should come after Bone_Deform.
Any tips?
One thing that's really helpful to keep in mind is that you can
copy one pose to another frame and then tweak that into a new
pose. All you have to do is go to the frame with the pose you
want to copy and select the root of the hierarchy and press Enter
(or Return) to bring up the Create Key panel. Now
select Current Object & Descendents (or
Hierarchy), then enter the frame number that you want to
copy the pose to. Press OK. The character will
now have the same pose on that frame as it does on this one.
You can go to that frame and adjust it to the new pose you
want. (This is especially helpful for facial poses.)
Now go to the Setup Mode for the slider and add that frame to a
slider channel.
How do I get to the negative frames?
Set your In point to a negative number ![]() , then slide the graph
over using the Motion Graph's "move" icon
, then slide the graph
over using the Motion Graph's "move" icon ![]() .
.