|
T u t o r i a l - Compose |
|---|
Skill Level: Advanced.
Now that you understand the basics of Compose, let's try something a little bit more advanced. I won't say "more difficult" though because it's not really. Doing it is easy, but the concepts are a little deeper. What you'll do here is load a scene with a character and apply a pre-made motion to it. That pre-made motion is called a Motion Clip. In this case it's a complete animation, but it could just as easily be only a walk cycle or something.
Slowly I turned...
1) Load Compose_Advanced_Blank_01.fxs from Scenes\Tutorials. If you press play you'll see that the camera has motion on it but nothing else does.
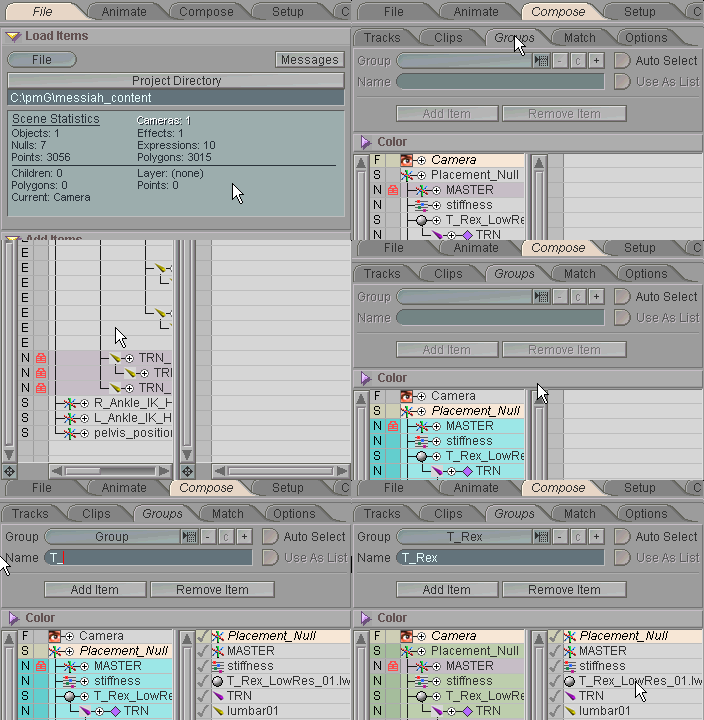
2) Go to the Groups sub-tab on the Compose tab. Do a multi-select and select from Placement_Null all the way down to pelvis_position then create the Group. Rename the Group to T_Rex. The default color of the Group is green, which, I guess, is suitable enough for a T-Rex. Certainly no one can prove otherwise.

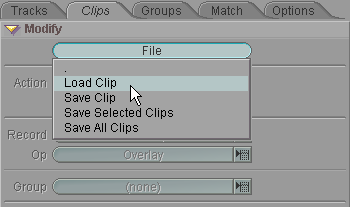
3) Now it's time to load some motion onto our character. Go to the Clips sub-tab and open the Modify block. Using the File pulldown, load Compose_Advanced_MotionClip.mcp from the Scenes\Tutorialsfolder. On the Clip block, rename it to Dons_Dino. What you have now is a character with no motion, and a Clip with motion. In the next step you will tell the individual motions within the Clip which objects they should apply to.
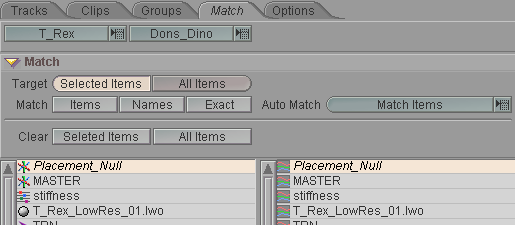
4) Go to the Match sub-tab. You'll see two columns. On the left is the currently selected Group, which is T_Rex. If you had more than one group in your scene you would use the pulldown list on the top left to select which Group you wanted to work with here. On the right is the current Clip, which in this case is Dons_Dino. And as you guessed, if you had more than one Clip loaded, you would select the one you wanted to work with by using the pulldown list on the top right.
Compose has extremely versatile object/motion matching capabilities. You can have it automatically match the objects to the motions or you can manually assign them. In this case we're going to do it automatically because it's the easiest way, and since the motions were clipped from this character the names will naturally match perfectly. But first I'll show you how to manually match (also called "assign") a name and then remove that assignment.
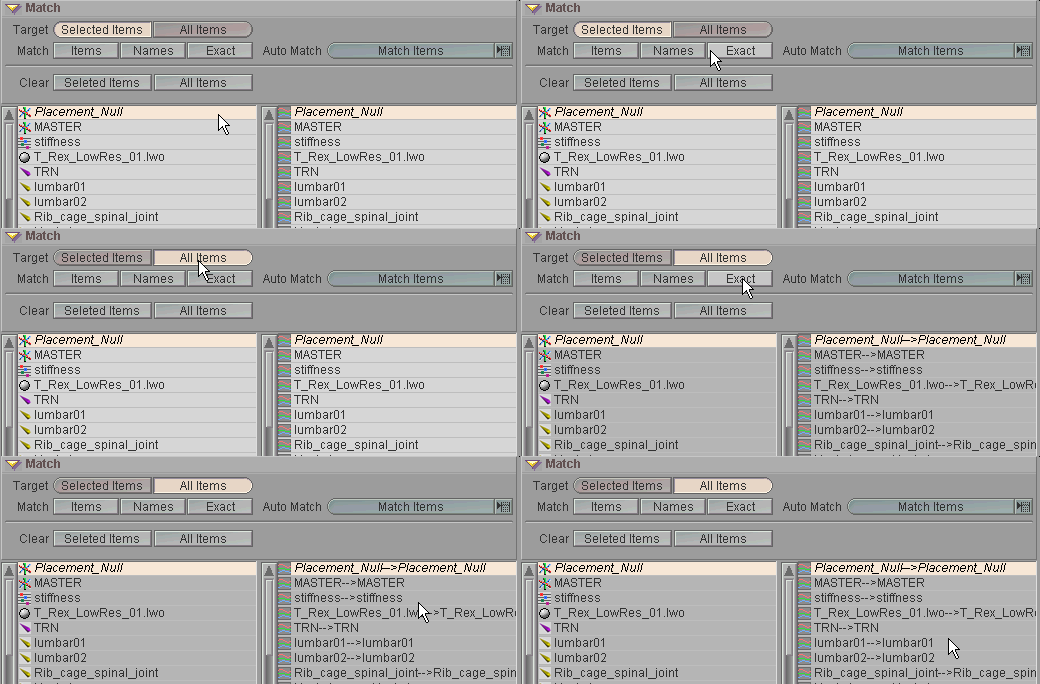
Here's how to match a specific item: Set the Target to Selected Items. Now select an item in the list on the left, then select a motion from the list on the right. Now press the Match- Items button. In the list on the left you'll see the motion with an arrow pointing to the item that this motion will be applied to. It's that easy. But for now, let's clear that assignment and continue with the tutorial. Make sure the motion you assigned is selected, then press the Clear- Selected Items buttons to remove the match you just made.
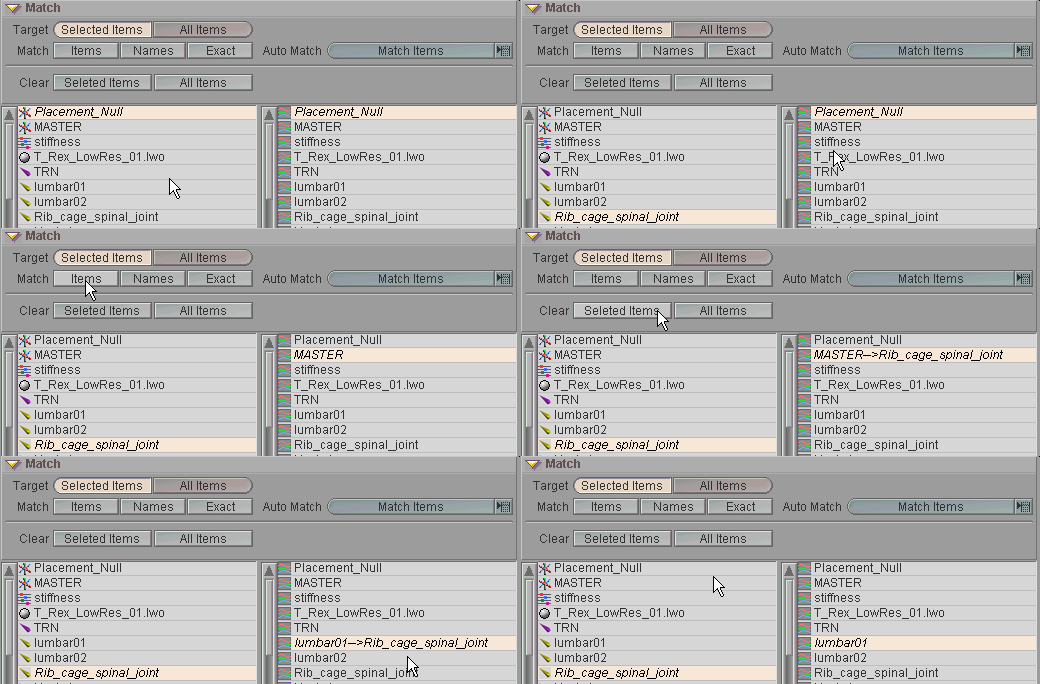
Let's continue. In the Target options, choose All Items. Since the names of the motions match the names of the objects, it doesn't matter which Match button you press now. In fact, you can try all three. Press Match- Items to see what it does, then press Clear- All Items and try Match- Names. Then clear All Items again and try Exact.
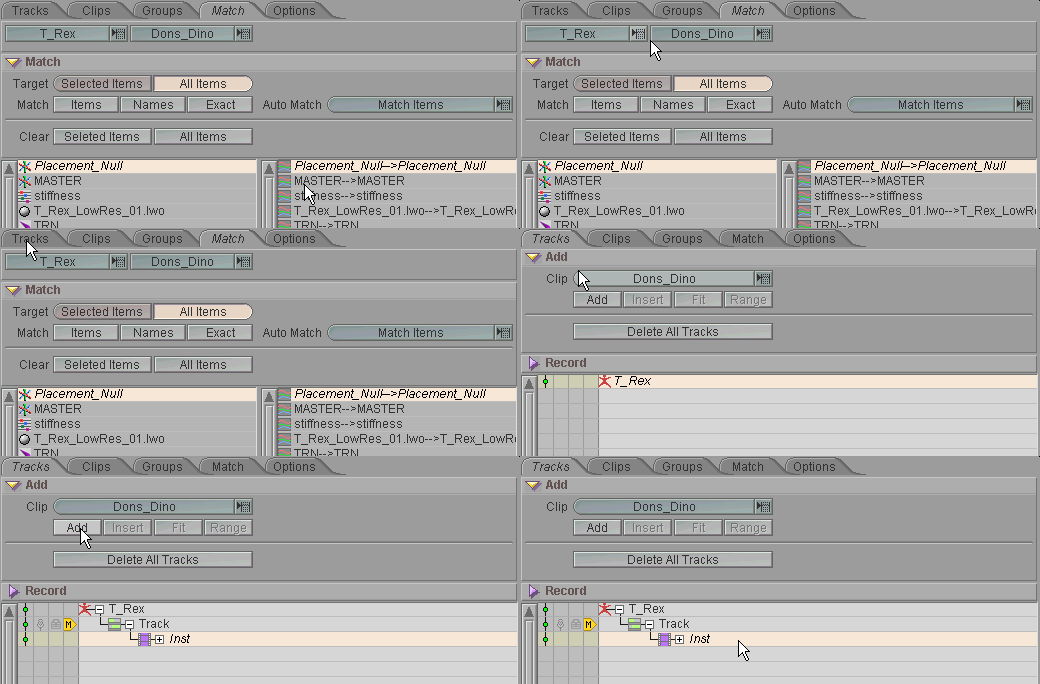
5) Click over to the Tracks sub-tab and open the Add block. Dons_Dinowill be visible in the Clip pulldown. Click on Add and you'll see a Track appear in the Compose List, along with a Clip Instance. And in the Track View, you'll see the big yellow block of the Dons_DinoClip Instance. Of course, what you'll also see is that the T-Rex character is thrown out of position. If you press play you'll see some motion but it won't look right. Don't worry-- Step 6 to the rescue!
6) Motion Compensation will fix the problem. There are five Motion Compensation options:

= No compensation
c Use the Rest position(s) contained within the Clip.
g Use the Rest position(s) that the members (items) in the Group are set for in the current scene.
ck Use the first keyframe of the Clip as the Rest position(s) and calculate the motion in the Clip relative to that.
gk Use the first keyframe on each member (item) in the Group as the Rest positions(s) and calculate the motion in the Clip relative to that.
In our case, we'll need to use ck, cycle through the other settings and you'll see why (though gk is close).
So select the entire group in the list (multi-select), then click through the Motion Compensation choices until you get to gk.

7) So now you've got the character loaded, the motion loaded, and the motion matched to the character. All that's really left to do is position the Clip Instance (the motion) to where you want it in the Track View. Collapse the Inst (Instance) in the list if you haven't already (so it's less cluttered) and select it. Now you can move the Clip Instance around in the Track View and position it where you want it, scale it how you want it, and even, if you want, modify the animation within it.

Move the clip so it starts on frame 30, then grab the Out handle (the red corner on the upper right of it) and drag it down to frame 250. When you press play now, the T-Rex will stand still from frames 0-30, then move fast from 30-250.

8) Now try this: Click over to Animate and do a little animation with lower jaw bone for 30 frames or so. When you press play, you'll see this animation happen, then the Clip will begin.


9) Now go back to Compose and go to the Clips sub-tab. Expand Dons_Dino in the list, then scroll down and expand the pelvis_position channels. Select the xpos channel and you'll see it appear in the Motion Graph. That is the motion of the Clip for that channel of that item. If you make changes to it now, it will apply to every copy of it (instance) on the Track View. Right now we just have one instance of it, but if it was something like a walk cycle, or wings flapping you might use it several times. So grab the first keyframe and move it up to about 2.0. Now when you press play, you'll see the T-Rex stand there for 30 frames, then lean over and begin walking. You just made him lean over. The reason this is great is that you can create a library of motions and be able to customize them when you need to.
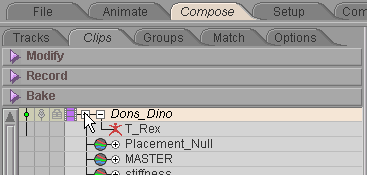
Expand the Clip elements (members).

Select the xpos of the pelvis.
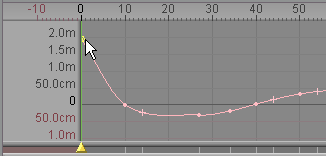
Adjust the keyframe to 2.0m (or do it on the Motion block).
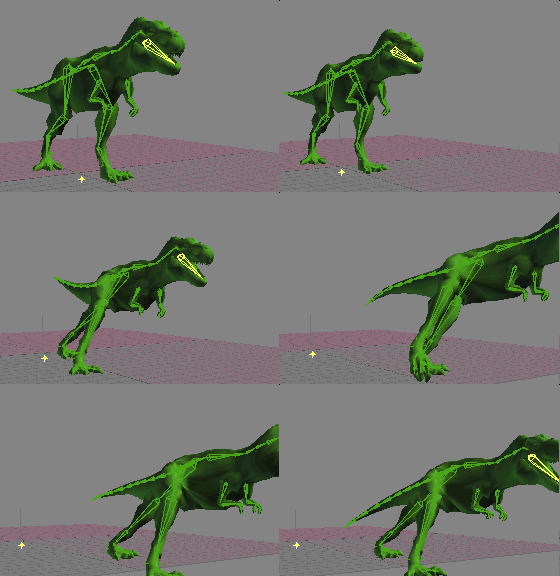
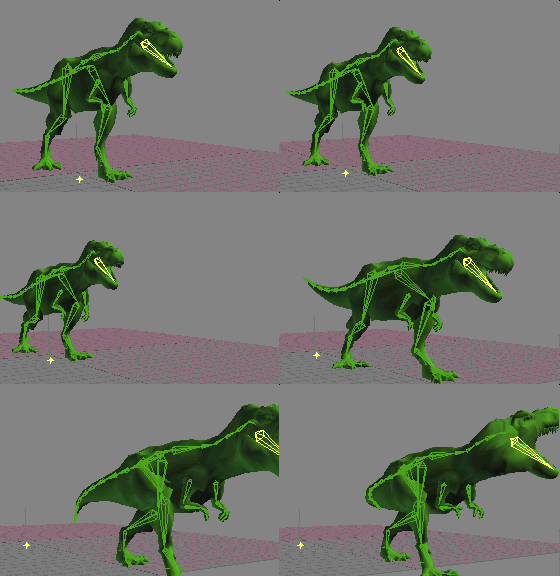
Final result with jaw moving and pelvis repositioned
at the start of the Clip.
10) One last thing. Let's look at one of the ways you can fade into a Clip. Select Track in the list and you'll see the Mix level for that track appear in the Motion Graph. As the name implies, the Mix level is a setting for how "strong" the track will be. For example, 0 would be off, and 1 would be on. A setting of 0.5 would mean the it is at half strength. You can use this setting to dissolve between tracks, or to fade the track in from keyframed animation and fade it back out to keyframed animation, etc.
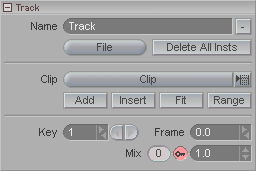
So make keyframes at 0, 35, and 50. Set the 0 and 35 ones to a mix level of 0.0, and the key at 50 to 1.0. Now when you play the animation you'll see the motion of the Clip slowly fade in.

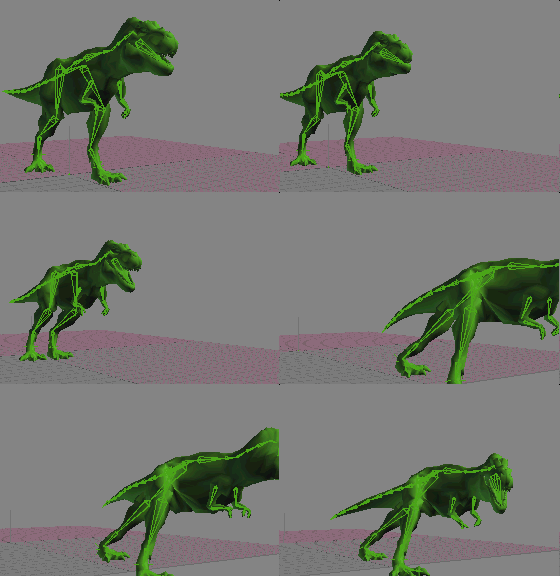
The final stupid-looking animation.
I hope you're proud of yourself.
Of course, the Group has its own Mix level, which is for adjusting the level of the entire group (character). And each Clip Instance has its own Mix level too, so you can make adjustments all the way down to that level.
A completed version of this scene (Compose_Advanced_Finished_01.fxs) is available in the Scenes\Tutorials folder.
Additional information:
There's more information about Compose here:
General Info - Compose - Using
General Info - Compose - List
General Info - Compose - Reference
| Converted from CHM to HTML with chm2web Pro 2.82 (unicode) |