|
T u t o r i a l - Spherize |
|---|
Skill Level: Beginner.
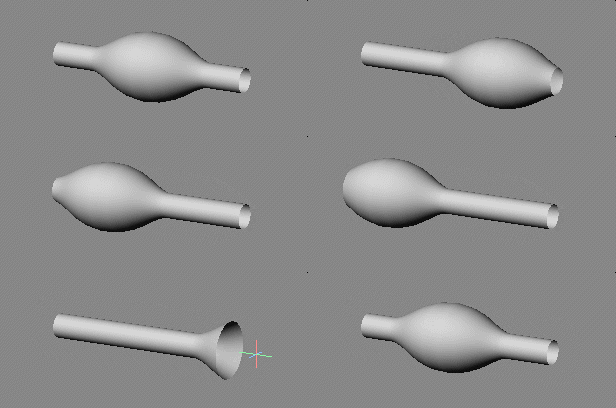
Spherize is a deformation effect that gives the illusion that something is inside an object and deforming it, like a snake after eating a large animal. There are a variety of uses for this effect, the two main ones being joint compensation (preventing meshes from pinching at joints) and muscles.

This tutorial:
This tutorial will show you the very basics of setting up
Spherize in an object. It's not a very exciting
project, but it's important to lay the foundation, well, except in
Los Angeles where houses are built hanging off the sides of
mountains just waiting for a good rain and mudslide. So just
follow these easy steps and in no time at all you'll be saying...
"man that was a stupid tutorial!"
So let's begin...
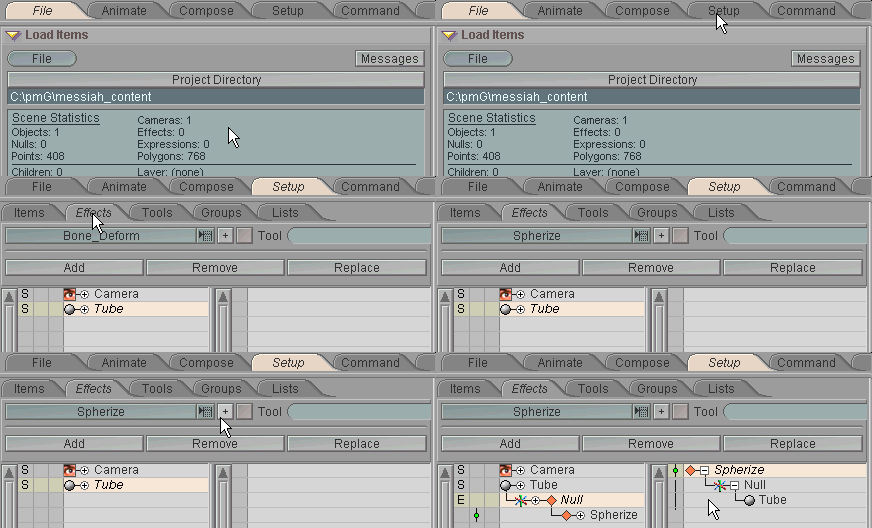
1) Load Tube.lwo from the Objects\Tutorial_General folder and press TAB to turn on MetaNURBS for it.
2) With the tube selected, go to the Effects sub-tab in Setup and select Spherize from the pulldown list, then apply it.
The End.
Yes, that's all there is to it. But now let's look at some of the parameters for the effect.
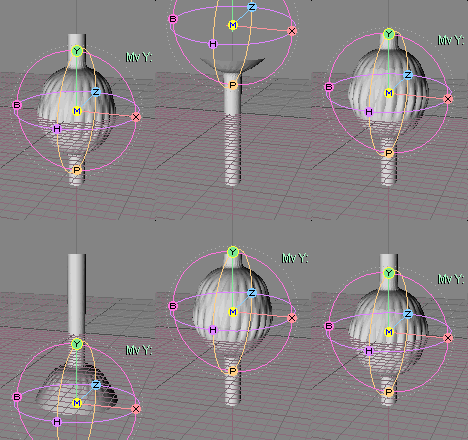
3) Click over to Animate and you'll see the tube with a huge sphere poking out from the middle. You'll also notice that the polygons look strange. That's fine; I purposely modeled the tube so you could really see what the Spherize effect was doing to it. Select the Y axis of the Null and drag it up and down. That's Spherize in action.
4) Now let's look at the parameters. Here's what the Spherize block looks like. You'll see this on the Animate tab when you have Spherize selected in the Item List.
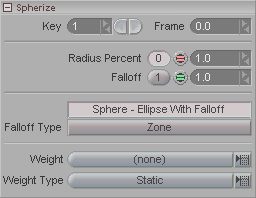
Here's what each parameter does. You can try each one out as you read about it.
Radius Percentage: This is the setting for the size of the outer radius of the sphere (in meters).
Falloff: How sharp the falloff of the effect should be at its edge. A lower number will cause a smoother, more gradual falloff, and a higher number will make it sharper. For a muscle, you would probably want his set high, or else it would look like a ball inside the arm or leg.
Falloff Type: Choose the type of falloff you want. The choices are:
Sphere - Ellipse With Falloff : Falloff from the radius to the outer radius percentage, whether the shape is a sphere or an ellipse.
Zone: Falloff starts at the center-point of the sphere and extends out from there.
The Weight and Weight Type options let you use other Weight Tools instead of the Null. For example, you can use a Curve and its Curve Points to set the size of the Spherize effect.
Remember too that you can alter the shape of the sphere with the X, Y, and Z scale channels of the Null (which is the Weight Tool used in this sample).
Here's something I did while playing around with some of the parameters:
|
|
|
And that's all there is to it. Well, to the basics of setting it up, anyway. Like most things in messiah, it's a bit deceptive: it may seem like an interesting novelty that you don't plan on using much, but as you get deeper and deeper into setting up characters and other effects, you'll start to find all sorts of uses for it.
A completed version of this scene (EffectTypes_Spherize_Beginner.fxs) is available in the Scenes\Tutorials folder.
Additional information:
General Info - Spherize Animate/Setup - Spherize block
| Converted from CHM to HTML with chm2web Pro 2.82 (unicode) |