|
T u t o r i a l - Cycle Branch - For Animations |
|---|
Skill Level: Advanced
Linking Hierarchical Animations To Sliders
Introduction...
As you saw in the CycleBranchMorphAddFrame - Pose tutorial,
CycleBranchMorphAddFrame is a very powerful function.
What I'll do here is show you how to have sliders control animation
rather than simple poses. The difference between this and the
regular Cycle function is that this one works for
hierarchies, while Cycle only works for the object it's
applied to.
Note: You should complete the CycleBranchMorphAddFrame - Pose
tutorial before doing this one because this one builds upon the
concepts of that one. It also uses the expressions that were
set up there.
Uses:
Again, the uses are limitless, but one good use is for facial
animation. While using poses, as in the last tutorial, is
good for most things, there are certain things that your character
might say often, like the names of other characters, or certain
words that I can't print here. You can animate those words
and link them to sliders, so whenever you need the character to say
it, just move the slider. Another use would be something
that's automated and cycles often but not on a regular enough
schedule that you'd be able to make it fully automated, like part
of a robot. So, let's begin...
Getting ready:
1) Set your view to Left, then load the scene called
CycleBranch_Starter_Scene.fxs from the
Scenes/Tutorials
folder. This will save us a lot of time as opposed to
creating a whole new setup.
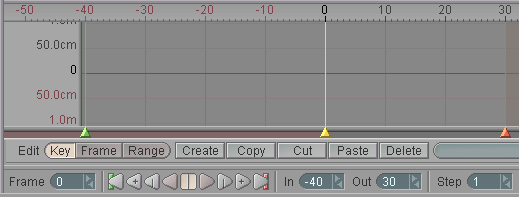
2)Set the In point to-40 then move the graph over so you can work with the negative frames.

3) Select the Upper_Arm and delete the negative keyframes for it (they're all on Pitch). Do the same for Lower_Arm.
Setting up the
animation:
4) Select the pitch channel Upper_Arm and
move the Current Frame Marker to frame -1 and
press Create (keyframe). In other words, frame
-1 should now be the same as frame 0. Do
this again for frames -20 and -40 (so
frames -20 and- 40 are the same as
0, then repeat the whole process for Lower_Arm.
|
What you've done is set up two areas to do animation. One is from -40 to -20 (20 frames) and the other is from -20 to -1 (19 frames). The cycles need to start and end at the default (rest) position to work properly. |

5)Do a little animation for Upper_Arm and Lower_Arm between frames -40 and -20, being VERY careful not to change -40 and -20 themselves (in other words, the animation should be -39 to -21). Just rotate their pitch. In my sample scene, I just made them swinging up, back and forth.
6)Do another little animation for Upper_Arm and Lower_Arm, this time between frames -20 and -1, also being VERY careful not to change -20 and -1 themselves (animate -19 to -2). In my sample scene, I just made them swinging down, back and forth.
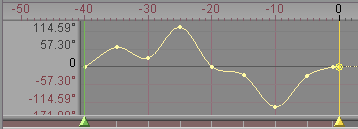
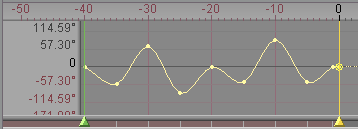
Pitch channel for Upper_Arm (left) and Lower_Arm (right)
showing the animation in the negative frame area. Note that
the
frames 0, 20, and 40 are all at 0 rotation. In frames -1 to
-20 the arm waves up, and from -20 to -40 it waves down.
7)Set the In point back to 0.
![]()
Now you're all ready for the expressions.
The Expressions:
8) Press
F3 to expand the left side of the interface, then go to the
Command tab and delete CycleBranch_3. We won't be needing that
here. Later on you can also hide the zpos slider if you
want. Do that on the Values block on
Animate.
9) Now select CycleBranch_1. You will modify this expression to tell it to use the animation between frames -1 and -20 instead of just the pose at -1. There are two changes you need to make to the expression. If you remember from the Pose tutorial, arguments 4 and 5 are frame number and the variable for how much of that pose will be applied. We used -1 as the frame number and the slider's X position (xpos) as the variable. Now, the frame numbers themselves will be the variable for argument 4, and the application amount (argument 5) will be a constant. Here's what you do to achieve this:
Where the
expression says-1 (which was the frame number from the old pose)
change that to
-1-19*[Slider:xpos]
What that's doing is applying frames -1 to -20 (because -1-19=20)
to the slider's x position channel.
Where it has [Slider:xpos] (at the end of the expression, not the part you just added) change it to just plain1 . What you're doing there is turning on the effect (0 is off, 1 is on).
Here is what the final expression should look like:

9)Now select CycleBranch_2and repeat step 9, but use -40+20as the frame range and make the slider channel ypos. This will tell it that the animation to use will be between frames -40 and -20 (-40 and the following +20 frames). As you can see, I've done this one different from the one in step 9. In that one I did -1-19. But it could have been written as -20-19, because it's the same thing either way. You either start at -1 and go 19 frames backwards to frame -20, or you start at frame -20 and go forwards to frame -1. So for this expression you can use either -40+20 or -20-20. They are both the same thing; like Le Tigre and Blue Steel (but not Magnum).
Here are the final expressions. Make sure yours match these:

That's all! Now make sure that the In point is at 0(or higher) and that you're actually at frame 0(or higher), then move the sliders. You should see the arms move through the animations you created. Pretty cool, isn't it?
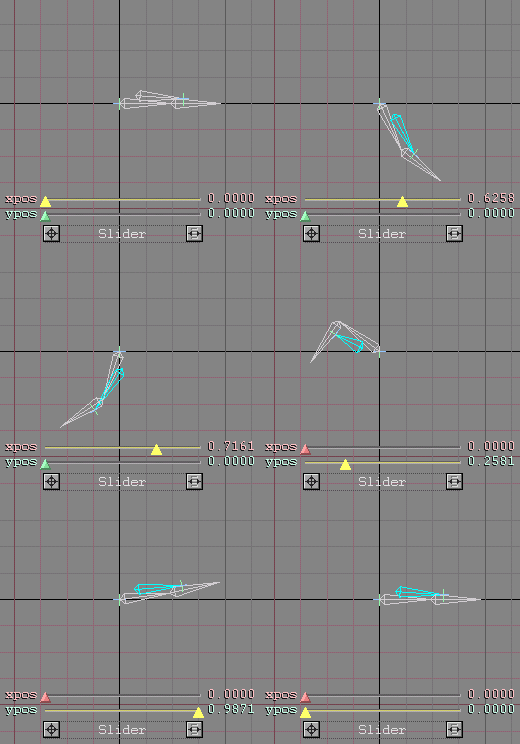
Note: Remember that it would be a good idea to give the slider channels (xpos and ypos) better, more descriptive names; the Slider itself too.
A completed version of this scene, Expressions_CycleBranch_Anim_01.fxs, is located in the Tutorials\Scenes folder.
Additional
information:
General Info - Expressions General Info -
Functions General Info -
Sliders Meaning of life
| Converted from CHM to HTML with chm2web Pro 2.82 (unicode) |