|
|
|---|
Surfaces is where you make certain settings to the camera and objects, such as which items and surfaces should render, which buffers they should render to, etc. It is also where you add lights and work with their settings. If you right-click on the Surfaces tab you will see the Surfaces context menu.
|
Create Light: Select this to create a new light. If there is no Light Master in the scene, one will be created. Create LightMaster: Select this to create a new Light Master. A Light Master is a parent and controller for one or more lights. For example, the Light Master block is where Ambient light is set. You must have at least one Light Master in your scene if you have lights. For more information about Light Masters, click here. Delete Light: Select this to delete the currently selected light or Light Master. If you are deleting a Light Master you will be deleting its lights too. You can also delete by pressing the - button on your numeric pad. New Render Group: Creates a new Render Group. Sync Object Selection: By default, when you select items in the Surfaces List it is only to adjust settings, so it doesn't actually select the item in the World View. If you want to have the Surfaces List actually select the item you are working on, turn on Sync Object Selection. (In other words, turn this on to make the object selection work like it does in the Items List.) |
|
The Surfaces List |
When you are on the Surfaces sub-tab the Item List becomes the Surfaces List. Here you can do things like enable and bypass objects, surfaces, and materials (to make them render or not render), arrange Render Groups, and set the Shader Blend Operators that control how multiple shaders should be combined (when there is more than one shader affecting a surface. It is also where you create lights and work with their settings.
The image above is pretty much what you will see whenever you are using messiah for rendering. There's the camera (which is collapsed here, so you don't see the camera surfaces), an object with its surface and material, and a Light Master with one light. Note: The image only shows a material on the object, but you can apply materials to lights and Light Masters too, making the lights into projectors. When a material is applied to a Light Master it applies to all of the lights that are part of that Light Master. You can override that on a per-light basis by turning off the little person icon (just like with Render Groups-- see below).
The image below shows some of the advanced things you can have in the Surfaces list. Important: This image doesn't have any lights in it, but everything here is applicable to lights and Light Masters. For information about Render Groups, click here.
Surfaces &
Materials:
In messiah a "surface" is a named polygon
(or group of named polygons). The Surface has no color/shading attributes at all.
That is what Materials are for. This is different than
some other programs, like LightWave for example, where a surface
is a material. The advantage of
doing it messiah's way is that it is much
easier to combine materials and use materials across multiple
surfaces on multiple objects.
Think of it like this:
Object = A bedroom
Surface= One wall of the room (or all of the walls)
Material= Wallpaper, paint, etc. Just like in real life, you can layer various materials onto a wall.
Combining
Materials:
A surface can have more than one material attached to it, so you
really have infinite flexibility with texturing. In the image
below, the Sky_Plate object has one Surface, called
Sky, and two
materials applied to Sky. One material is
called Sky_Color and the other is called Cloudy.
Materials are combined by using the Shader Blend Operator, which works just like the Blend Operators in other parts of messiah (additive, subtractive, etc.). In addition to that, you can set the Opacity of each layer on each layer's Shader block. You can also use one shader to control the opacity of another shader. Keep in mind that materials can be applied to lights too, so in essence you are "illuminating textures" on the object, therefore, all of this goes for lights too.
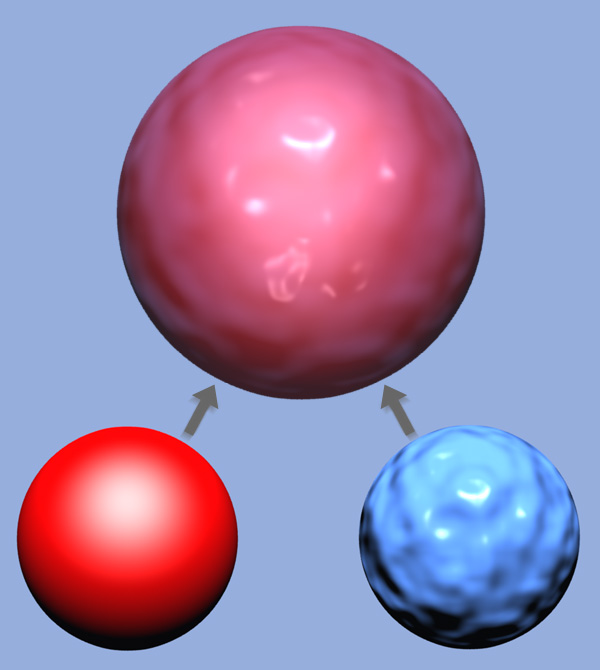
The image below is a quick example of two materials applied to the same surface. This is a simple 50/50 blend between the two materials. As you can see, it creates a nice marble-like effect and has the feel of translucency even though it's not.