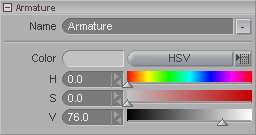
 This block lets you rename the armature.
You can also rename it just like every other type of list, by
double-clicking in the list itself.
This block also lets you set the default color for the armature's lines and text. You can set the color for those for each individual handle too.
![]()
When the handle Action is set to Command, this block appears at the bottom of the interface. Use the pulldown to select from one of the many commands that you can set to happen when you click the handle icon.
For example, in the image above, when you click on the icon it will open up the coordinates chooser on the bottom right of the interface. Keep in mind that each handle can have three different mouse-click actions: left mouse button, middle mouse button, and right mouse button.
![]() When the handle Action is set to Run
Expression or Compute Expression,
this block appears at the bottom of the interface. In the
Exp field you can enter the expression
that you want to execute when the handle icon is clicked or dragged
(depending upon the action you have chosen on the Handle block).
When the handle Action is set to Run
Expression or Compute Expression,
this block appears at the bottom of the interface. In the
Exp field you can enter the expression
that you want to execute when the handle icon is clicked or dragged
(depending upon the action you have chosen on the Handle block).
For example, in the image above, clicking on the handle would set the Item List visibility to All Items. (See Tips & Tricks.)
 First choose what type of action you
want to happen, Visible, Hidden, or Toggle. This is so a
handle can control the visibility of other handles.
Then choose what should be affected when you click. The choices are: Self (just affect this handle), Siblings (affect this object and others that are in the same place in the hierarchy), and Children (only affect the handles that are children of this one.
Most common setting: Toggle--Children (or Siblings)
 This is for when you are using the
Target drag type. Set the
Controller to be the item that will look
at the target, which you choose here.
For example, if you set the Controller to be the Camera, then whatever you choose in this list will be what the camera looks at. This will override the camera's rotation controls.
Double-click on the black arrow icon at the top left of the World View to see a sample. Then double-click again to make those buttons reappear.