Action Block
Type: Choose which type of handle you want it to be: Drag, or Click.
Click means that you click on it and something happens. For example, you can make a button that will turn MetaNURBS on/off when you click it.
Drag means that you click and drag the handle. For example you can make a handle to drag an item, like an IK goal, around.
Add Action: Choose what you want to have happen when you click or drag on the Armature handle. Drag and Click each have their own options here. Note: You can create your own actions too, through scripts and plug-ins. We'll post information
Drag--------------------
Controller Drag - This handle type will control the object it is connected to. (See Handle block.) You have the option of setting what each mouse button does. For example, you can set the left mouse button to control the Y axis, the middle button to control Heading, etc. The image below shows some of the possible settings. Click on the options, such as the channel selector, and coordinates selector to cycle through them (left-click to go forward in the list, right-click to go backward).

Drag Handle - This lets you drag the handle around. It is useful for making clickable buttons that you might need to reposition on the screen from time to time (without having to jump back to the Armatures tab). For example, you can set it so you drag it around with the right mouse button, and with the left and middle buttons it can perform operations, like changing the view settings, or turning IK on or off.
Easy Knee - As the name suggests, this was created to make knees easier to setup with IK. Make an IK leg setup-- upper leg, lower leg, and foot. Make an Armature Handle with Easy Knee as the Action. Set the Controller (on the Controller block) to the lower leg bone (or object if it is hierarchical objects). The handle will snap to the knee. When you animate, you can use the Easy Knee handle to move the knee around.
Move Towards - This will cause the Controller (the item the handle is attached to) to move toward the currently selected item. For example, attach a Move Towards handle to item A. Now select item B then grab the item A handle and move it. It will only move toward item B, bringing its controller, item A, along with it. Now select item C and when you grab and drag the item A handle, item A will only be able to move toward item C. There is a sample scene, called MoveTowards_ArmatureActionExample.mpj in the Scenes\Samples folder.
Run Expression - A Handle (button) can run any expression. After you create a Run Expression handle, go down to the bottom and enter the expression into the Compute Expression block. Note: If your expression is just a single operation, like an on/off switch, use the Click type handle, not Drag. Drag is for when you have an expression that will run as long as you drag the handle.
Target - This is just a sample action to show some things that are possible. We recommend using the Target function (expression) instead of this. But here is an example of the way it works: Set the handle Controller (on the Handle block) to Camera, then set the Target of this action to some other object (on the Target block). Then add another Action, this time a Drag Control. So now when you drag the control it will move the camera but the camera will stay aimed at the other object.
Click---------------------
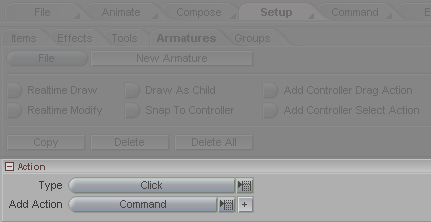
Command - Use this to execute a command when the Handle is clicked. Choose from the Command pulldown list that will appear at the bottom of the interface. For example, you can make an onscreen button to change the item list width, or turn on/off a different coordinate system, etc. Everything that is available as a keyboard shortcut is available to make a click button from-- over a hundred commands!
Compute Expression - A Handle (button) can run any expression. After you create a Compute Expression handle, go down to the bottom and enter the expression into the Compute Expression block. Note: If your expression is just a single operation, like an on/off switch, use the Click type handle. Use a Drag handle when you have an expression that will run as long as you drag the handle (see Drag, above).
Controller Select - Use this action if you want an item to be selected when you click on the Handle. This is often used in conjunction with a Drag Handle. When you do that, you click and drag on the handle, but it actually selects the item too, so you can keyframe it.
Handle Visibility - Lets you click to toggle the visibility of the handle on and off. Use the Handle Visibility block to adjust the specifics.
| Converted from CHM to HTML with chm2web Pro 2.82 (unicode) |