|
T u t o r i a l - Basic IK Setup |
|---|
Skill Level: Beginner.
IK (Inverse Kinematics) is a way to move a character's limbs (well, it can be used to move anything really, but usually it's for characters). There are two ways to set up IK in messiah: using the IK block on the Animate tab, or with expressions. In this tutorial, we'll do both methods. A completed sample scene is available in the Tutorials scenes folder; it's called General_IK_Beginner_01.fxs.
Both methods start with creating the skeleton, so I'll only write about that part once. Go ahead, call me lazy, see if I care.
| Part 1 - Creating A Skeleton: |
Note: It's best to be in "Left" view for this tutorial so you can see better. Also, there are many ways to set up an arm, so don't think it must be done this way every time.
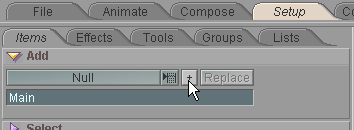
1) Go to Setup, and from the Add block add a null object called Main, then one called called Arm and parent it to Main. We're not going to use an actual object in this tutorial, because it will be easier to see what's going on without one.

2) With Arm selected, go to the Effects sub-tab and add Bone_Deform from the pulldown list.
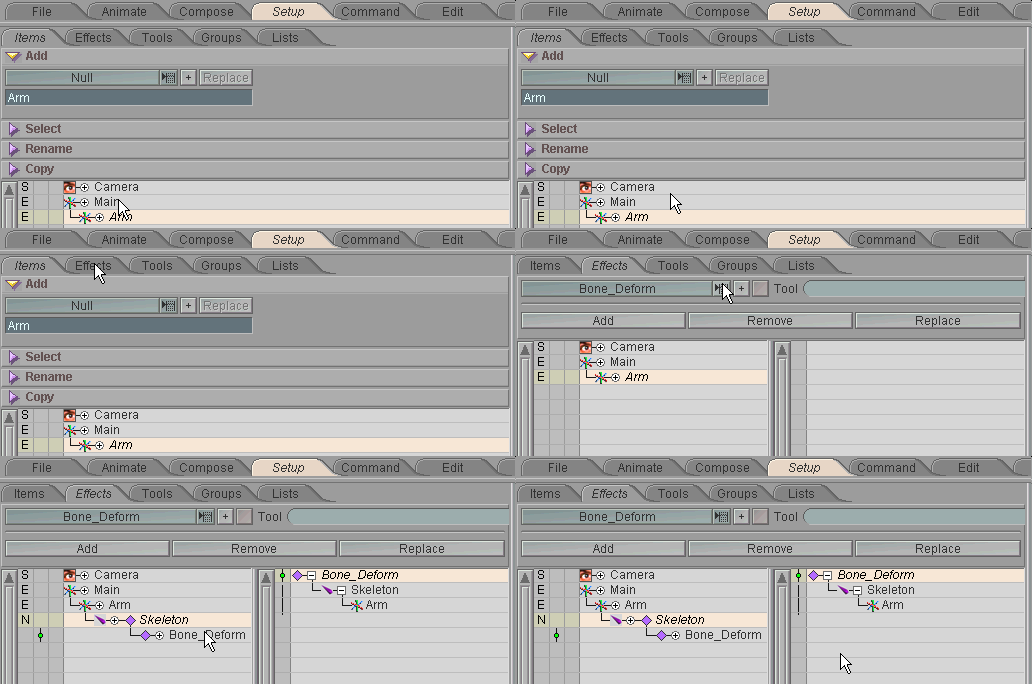
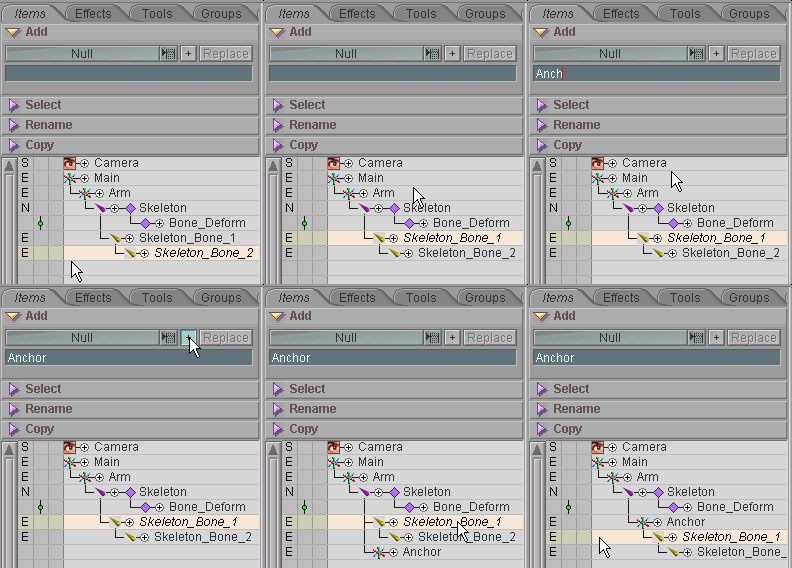
3) On the Skeleton block, create two bones by clicking on Add Child twice.

4) Back on the Items sub-tab, selectSkeleton_Bone_1 then create a null object called Anchor. This will be our IK Anchor. (The name has no effect on anything, it just makes things easier to understand when you look at the Item List.) The IK anchor is the root object of the IK chain. Items that come above it in the hierarchy will not be affected by the IK, only it and its descendents will. In most cases, some part of the shoulder would be the anchor for an arm. Change the parenting so Skeleton_Bone_1 is a child of Anchor.
5) Create a null object called Effecter and parent it to Skeleton_Bone_2. This will be our IK End Effecter. The End Effecter is the end of the IK chain, and it's the item that is told to follow and move towards the IK Goal.
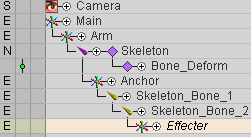
6) Move Effecter along Z to the end of tip of Skeleton_Bone_2 (its Z position should be 1.0 now).

7) Create a null object called IK_Goal and parent it to Main, then move it to the end of Skeleton_Bone_2 (at the Effecter). This will be the "goal" that the Effecter will follow and move toward.

8) Select Main and press / (forward slash) on your keyboard. This will clone everything you've done. Now select Main_1 and move it down on the Y axis so you can see both setups.
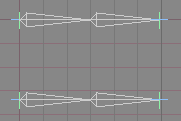
We're going to use regular IK on the top setup, and expressions IK on the bottom.
| Part 2 - Regular IK: |
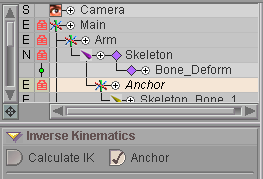
1) Select the Anchor null of the top version of the arm, then go to the Inverse Kinematics block on the Animate tab and turn on Anchor.
2) Select the Effecter null for the top version of the arm and turn on Calculate IK. Then in the Goal pulldown list, select theIK_Goal of the top version of the arm. The IK Type should be set to 2D.
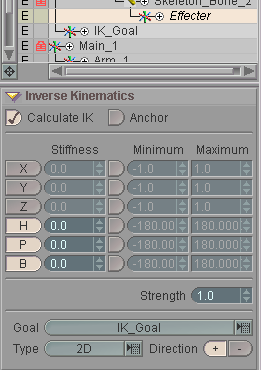
That's all there is to it with the regular IK setup. If you select the IK_Goal and move it around, you should see the arm follow. As you'll notice, the elbow will bend toward the left. If you want it to bend the other way, as I have it in the images here, select Skeleton_Bone_2 and on the Inverse Kinematics block, press the - (minus) Direction button.
Now lets move on to the expressions version...
| Part 3 - Expressions IK: |
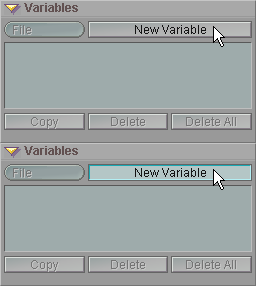
1) Go to the Command tab and click on New Variable and name it Inverse_Kinematics.
2) On the Expressions block, select IK2D from the functions pulldown list.
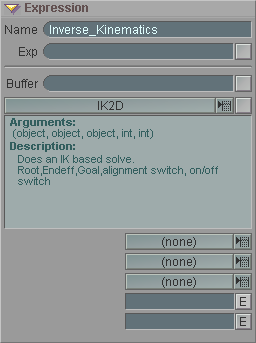
3) Now it's time to fill in the expression arguments. Here is what it's asking for:
Anchor, or root object. This is the equivalent of step 1 in the Regular IK section.
Effecter. The object that will be moving toward the IK Goal.
Goal. This is the IK Goal that the arm will follow.
Alignment Switch. Thisbasically comes up with an IK solution but only applies it to the child items (i.e. not the Anchor). If you set it to 0 then follow the IK2D function with an IKAlign it will work as if you had set this Align Switch to 1. So it allows you to split up the way the IK solution is applied to the chain. I haven't found a use for it yet but good to know it's there.
On/Off Switch. 0 is off, 1 is on. Naturally in this case we want 1.
And here's what you should put for each of these:
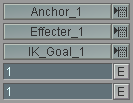
4) After the arguments are filled
in, right-click on the ![]() button to the
right of the functions pulldown list. This will apply the
expression.
button to the
right of the functions pulldown list. This will apply the
expression.

To test it out, select IK_Goal_1 and move it around. The arm should follow it. You can adjust the direction of the bend in the elbow the same way you did with regular IK.
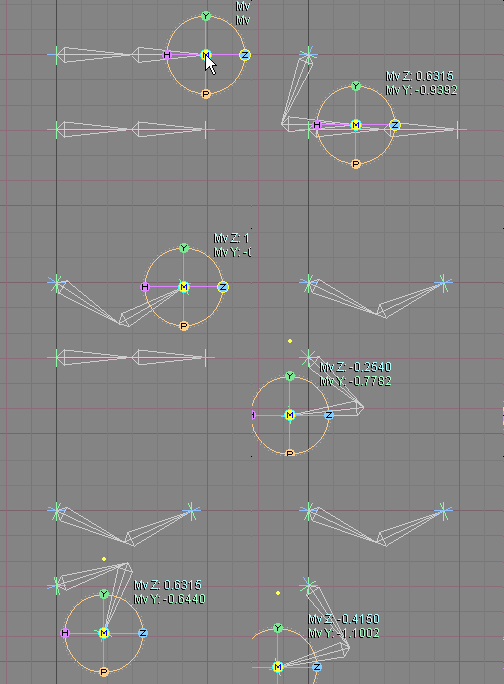
One last thing:
To get rid of the clutter on the Item List (since all you
need to animate are the IK goals), turn on Hard Lock for
everything except the Camera and the IK goals, and collapse the
Arm hierarchies so
all that's there is what you see in the image below.
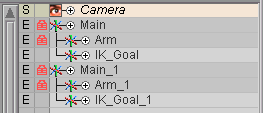
Congratulations, you have just created two IK controlled arms! Now go make Toy Story 3. (By the way, most animators I know us FK for arms and IK for legs.)
Additional information:
General Info - IK (Inverse Kinematics)
Animate - Inverse Kinematics block
| Converted from CHM to HTML with chm2web Pro 2.82 (unicode) |