|
|
|---|

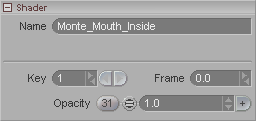
Each shader, including the Material itself, uses this block.
Name: Give this shader a distinctive name so it will make sense to you in the future.
Key: (For the Opacity setting.) Moves through the existing keyframe numbers. Enter a number in the entry field to go to a specific key or use the arrows to scroll through. Note: This is not referring to the frame number, but rather whether it's the first keyframe, second keyframe, etc. For example, the first keyframe might be on frame 0, and the second keyframe might be on frame 65.
Frame: (For the Opacity setting.) Displays the frame number that a keyframe is on. Also, you can type a number in here to change the actual frame that a keyframe is on. For example, lets say you have keyframe #2 and it's on frame 33. Just type in 52 and now keyframe #2 will be on frame 52. It's a really fast way to accurately move a keyframe.
Opacity: For the shaders attached to the Material, this Opacity setting acts as a blending control (working in conjunction with the Blend Operator). For the Material itself, it acts as a dissolve, with 0 being transparent, and 1.0 being solid (opaque).
One use of the Opacity (for the material, not the other nodes attached to it) is for clip maps. For example, attach a Texture Map node to the material's Opacity and use a clip map image as the texture map. The reason you should use Opacity for clip maps instead of Transparency is that a transparent object can still be seen under certain circumstances. For example if it has specularity. Indeed, that is how you make things like glass-- transparency and specularity.