

The Palette is where your messiah:scripts, Setups, SetupScripts, Clips, Performances, and Materials are kept. To access the Palette, press F5 on your keyboard. To close it, press F5 again. Certain Palette options are only available when in certain modes. For example, the Setups and SetupScripts tabs are only available when you're in Setup, and the Materials tab is only available in the Render mode (messiah:studio only). Performances and Clips are part of Compose.
Using Items In The Palette:
To use any of the items in the Palette, just double-click on
them. If it's something that will apply to an item, like
putting a Setup onto a character, select the object in the
Item List, then double-click on the Setup that you
want to apply.
Saving Items To The Palette:
There are different ways to save an item to the Palette,
depending on which item type you're trying to save.
Saving a Script:
Scripts are created in a text editor. Save them into the scripts folder inside the messiah\modules folder.Saving a Performance:
In the Tracks sub-tab, select a Group in the Item List and you'll see the Group block appear below. Click on the File pulldown and select Save Performance. (Performances can be loaded by double-clicking on them in the Palette, or by using the File pulldown and selecting Load Performance.)Saving a Setup:
Setups are saved from SetupGroups sub-tab on the Save block. To turn on the Save block, turn on Activate Setup Saving on the Create block. When you save the setup, an image, for use in the Palette, is saved also. The image is whatever is the active view in the World View when you save the setup.
Using a Setup In Your Scene
To apply a setup (like the one in the example above), double click on the Setup Icon in the Setups Palette, such as Leg_Right in the image above.The setup's items will all be parented to the currently selected item. All variables will placed at the root level. As mentioned in the section on saving Setups, all variables in the setup should have a common parent variable; if they don't it will clutter up the root level of your variables list.
Chances are pretty slim that a saved setup will fit the character that you are about to use it on. Setups, and Groups in general, can be resized with a feature called Group Refitting that appears in the Setup-->Groups tab.
Saving a SetupScript:
SetupScripts are saved from your text editor into the scripts folder inside the messiah\modules folder. The difference between a Script and a SetupScript is just the identifier at the top of the SetupScript. A SetupScript has #define SCRIPT_SETUP_PALETTE 0 near the top. See the NewSpotlight.msa SetupScript as an example.Making Your Script Visible In the Palette And Making It Usable
1) Add the following line to the top of your script:
#define SCRIPT_LAUNCH_ACTIVATION 0
to make it visible in the Scripts Palette or:
#define SCRIPT_SETUP_PALETTE 0
to make it visible in the Setup Scripts Palette.
2) When you double click on the Script icon the 'main' function will be called, so you'd better make sure that the function you want to execute is called 'main'. (See the 'motlib' family of scripts.) There is one main script that contains all of the functionality, it is called motlib.msa. Each function that is to be placed in the Scripts Palette has it's own file, motlib_SetupToCurrent.msa for example. That script has a 'main' function that calls motlib.SetupToCurrent( ).3) If you wish to use your own icon for your script create a 32x32 uncompressed .BMP file. Name this file the same as the script that it should represent (e.g. for MyFunc.msa you would create MyFunc.bmp). Place this file in the messiah/modules/scripts/icons directory. That's all there is to it. Click here for motlib info.
Saving a Material (messiah:studio only):
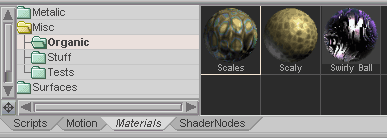
From the right-click context menu on the Materials sub-tab, choose Save Material, then save it to the materials folder in messiah\modules\materials. You will see some default sub-folders in there; you can use one of those folders, or make your own. These sub-folders can be helpful to organize your materials (such as Organic Materials, Metallic Materials, etc), and/or to organize by projects. Note: Saving a Material saves the Material node as well as any nodes connected to it. (As opposed to saving a shader-- see below-- where it just saves the node or node tree.)Loading a Material (messiah:studio only):
Double-click on the material in the Palette, then apply that material to a surface from the Surfaces sub-tab-- select the material in the Materials Tray, then select the surface in the list below and press the Apply Material button.Saving a Shader Node or Shader Tree (messiah:studio only):
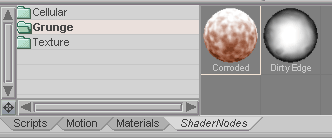
Right-click on the Shader node you want to save and choose Store ShaderNode... then choose where you want it. If you save it into the messiah\modules\materials folder, the shader node will appear in the palette. Make sure you have a preview on the node before saving, because it will use that image as the icon. To turn the node preview on, right-click on it and choose either Preview Input, or Preview Output (whichever you feel is best), then choose which type of preview (again, your choice). Note: If the Shader Node is part of a Shader Tree (connected to other Shaders) it will save the entire tree (but not the Material node itself). If you want to just save the individual node, just temporarily detach it from the others.