|
S e t t i n g U p F o r 3 D S t u d i o M a x |
|---|
Note: messiah:animate and messiah:studio work with 3D Studio Max 4.2 and higher.
How it works:
There's three basic things that you might want to do with
messiah and 3D Studio Max together:
-
Bring a Max scene or object(s) into messiah and animate there.
-
Bring a messiah scene into Max to continue working there and render there.
-
Some combination of the above.
Each of those is possible of course, so you can do virtually anything you want with these two programs.
Setting up 3D Studio Max:
Before using messiah with 3D Studio Max for the first
time, the messiah plug-in must be added to it. Here's
how to do that:
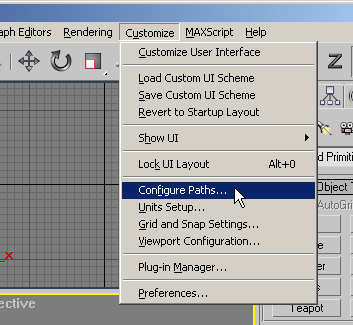
1) Start 3D Studio Max and go to Customize-->Configure Paths.
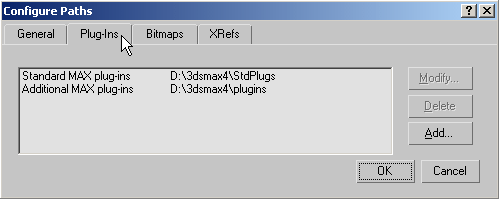
2) Click on the Plug-Ins tab and then on the Add button.
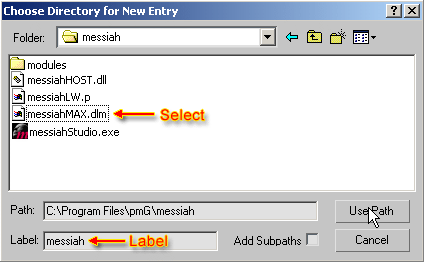
3) Navigate to the messiah folder, which is where the messiahMAX.dlm is, and in the Label field, type messiah, then click the Use Path button. (The folder is where your messiah executable. By default this is c:\Program Files\pmG\messiah but if you installed the program to somewhere else then go there.) Do not move the messiahMAX.dlm file; it needs to stay there.
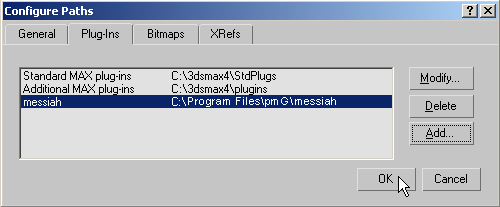
4) Click OK then exit and restart 3D Studio Max. Now messiah should be available as one of your available plug-ins.
Important Note: The grid units that 3D Studio Max uses can be different than messiah's. Here's how I have my measurements set up so everything is the same between the two programs:
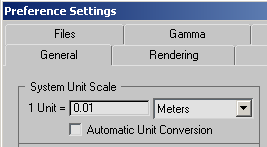
And when I load a 3DS format model into Max (using Import) I turn off the "Convert Units" option. So when an object that is supposed to be 1 meter tall is loaded this way, it shows up in Max as 1 meter high, and in messiah as 1 meter high (and in LightWave too).